Last updated on July 22nd, 2023 at 02:52 pm
*This post may contain affiliate links and we may earn a small commission if you click on them.
Adobe is about to be your best friend when it comes to pattern projecting for sewing. Adobe is so versatile and unlocks key features of projector files. If you are new to using Adobe, then you are in the right place! I walk you through downloading Adobe, opening projector files in Adobe, some of the most useful tools in Adobe, and setting preferences for the best pattern projecting experience.
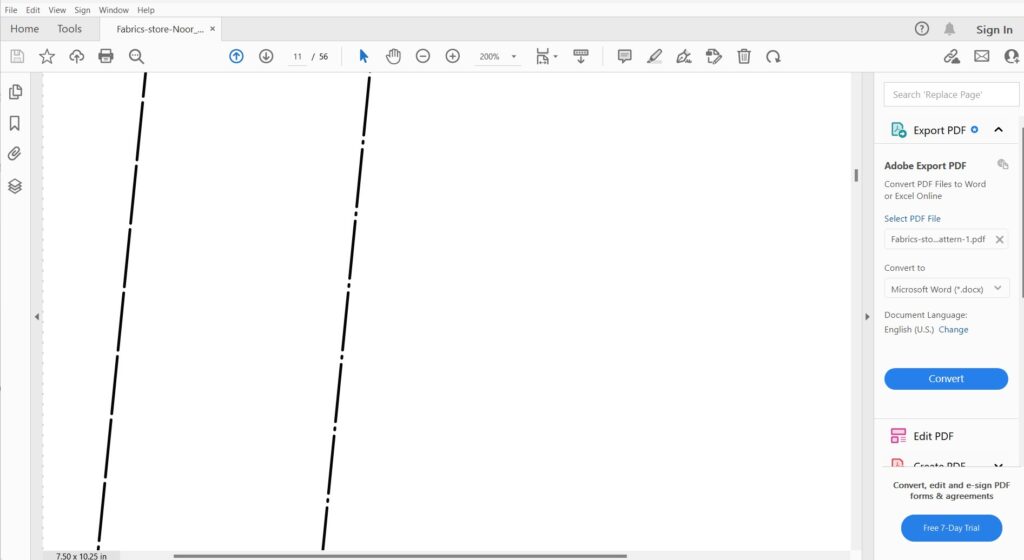
Recently Adobe has been rolling out an updated version of Adobe. While you can do the same things for free in both versions, the locations are slightly different. Here are what both versions look like so you can follow along with the version that is installed on your computer!
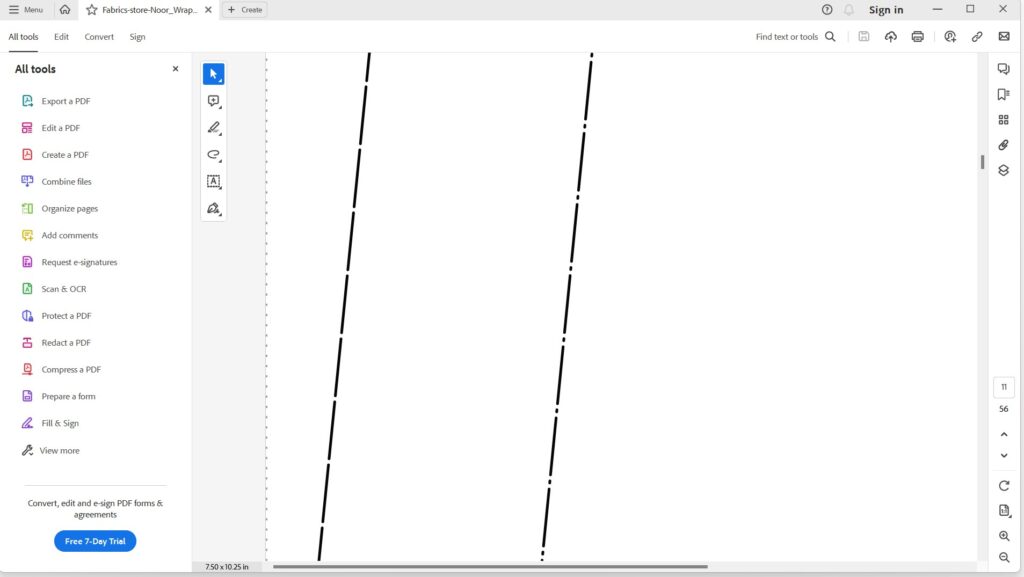
Come along with me and let’s get started!
How to Download Adobe
Adobe is a necessary program for projecting patterns from a computer. The best part is that Adobe Acrobat reader is absolutely FREE! Just download the reader here: Adobe Acrobat Reader DC Download | Free PDF viewer for Windows, Mac OS, Android.
There is a Pro version, but that is not necessary! The reader DC is what you need to read, project, and annotate patterns.
Just click the download button and install the program on your computer. It is that simple.
Watch a Video on the *New* Adobe
How to Open Files in Adobe
Now, you may be wondering how to open pattern files in Adobe. Often computers will default to opening PDF files online. If your pattern files are on your computer hard drive, there are two ways you can open your patterns to view in Adobe. First, you can right click the pattern file on your computer and select “Open with”> then choose Adobe Acrobat. Or, you can first open Adobe, then select File>Open. Then, locate the pattern file on your computer and click it.
If you are like me and store your projector pattern files on the cloud, you will need to download the file to your computer first. Then you can open them using one of the methods above.
Useful Tools in Adobe
Adobe has a plethora of tools for many types of users. You will find that as a projection sewists (I just made that up, but I think it sounds great!), there are many tools you will use over and over again and some that you will never need. Here are a few of the basics that you will use every time you open a projector pattern file.
Layers
Layers are one of the best and most useful tools on all PDF patterns including A4/letter, A0, and projector files. You may already be familiar with using layers if you cut out a specific size on A4/letter sized PDF patterns. Layers are an even more useful tool when projecting patterns in Adobe.
Access the “Old” Adobe Layers
On the left, middle of your screen in Adobe you will see a small arrow. Click that arrow and a menu of pictures will appear (left side of the picture below). The only picture you really need to use is the last one that looks like a stack of papers.

Click on the stack of papers image and the layers menu will open. You will often see calibration grids of 1” (Here there are two layers 5” grid and 1” grid). These calibration layers are to check your zoom on your cutting mat. This will ensure that the pattern is zoomed into the correct “actual” size and your pattern will fit correctly. Once you have double checked the zoom for the pattern, you can turn off these layers.
There will often be locked layers that cannot be turned off that include copyright, pattern instructions, and other important information. You can select and deselect all other layers as needed. Selecting only the layers you need to cut will declutter the projection image and help you cut on the correct lines.
Once you have selected the layers you want to view, click the menu arrow again and the layer screen will collapse to the left.
Access the “New” Adobe Layers
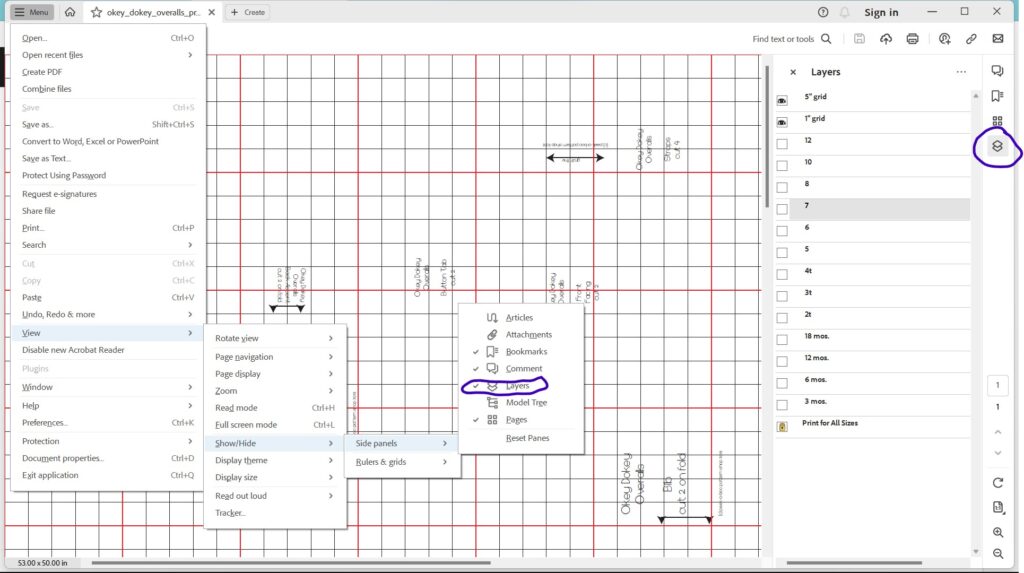
The layers panel on the new Adobe layout is on the right-hand side of the screen. If you do not see the stack of papers or layers panel, you may need to go to Menu>View>Show/Hide>Layers.
Pan
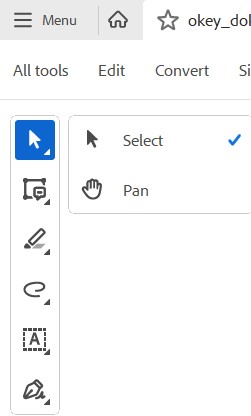
The pan tool allows you to pull and drag the pattern to wherever you need. It is a simple tool that will be used frequently. In order to pan on a projector file, you will need to first click on the hand on the top of the screen.

This is the pan tool. When your mouse hovers over the pattern you will see a small hand if this tool is selected. Click your mouse and drag your pattern to the area that you need.
Rotate Pages
“Old” Adobe Rotate
Sometimes you will see icons on the Adobe menu for rotating pages. If you have tried using these, a popup saying you need to upgrade to the paid version of Adobe may have appeared. DON’T fall for it! You can rotate pages in the free version, you just can use those buttons.
To rotate the page in Adobe go to the top Menu and choose View>Rotate View and choose clockwise or counterclockwise. You can rotate the image as many times as you need. You can also use a keyboard shortcut to rotate. This is especially handy in full screen mode. To rotate the image clockwise press Shift + Control (Command on Mac) +Plus (+). To rotate counterclockwise, press Shift + Contol (command) + Minus (-).
Want a printable shortcut cheat sheet? Make sure to check out Digital Annotations Part 2. This article goes through making simple adjustments to patterns in Adobe.
“New” Adobe Rotate
Now you can use the shortcut for rotating pages without being prompted to upgrade Adobe to the Pro version! Yay! The rotate shortcut is located in the bottom right corner and looks like an arrow going in a circle.
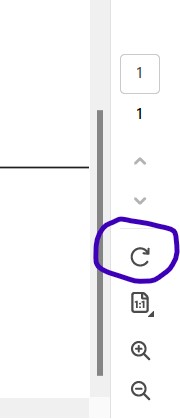
Other ways to rotate are using the menu and shortcut keys. To use the menu go to Menu>View>Rotate View.
The keyboard shortcuts are CTRL+Shift+ minus(-) or CTRL+Shift+ plus (+).
Zoom
Zoom and calibration go hand in hand. If you have not already calibrated your projector, then you will soon become friends with the zoom tool in Adobe. Zoom is what allows that projected pattern to project and “actual size” image. Each person’s zoom percentage will be different based on their projector setup. To learn how to calibrate a projector for sewing review How to Calibrate.
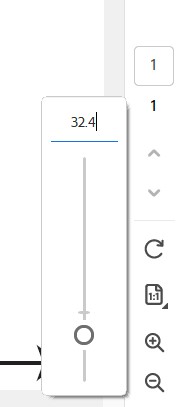
Zoom can be adjusted using the “minus” or “plus” buttons to zoom in or out. In the “Old” version this was at the top of the screen. In the “new” version of Adobe it is in the bottom right corner.
Once you know your calibration percentage, you can click on the numbers near the + sign and type in an exact zoom. You will also want to check your zoom before cutting any patterns. Keep reading below to see how to maintain a zoom percentage when going to full screen mode.
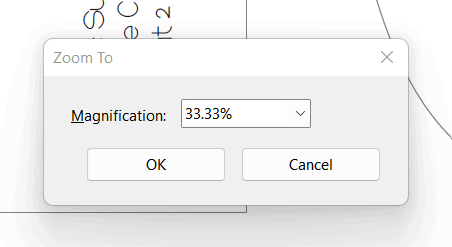
The EASIEST way to access zoom is by using the keyboard shortcut. The shortcut Control/Command + Y and the zoom box will appear. Type in your zoom percent and press “okay”.

Full Screen mode
Full screen mode will help you to take advantage of the entire projection screen and is especially useful for larger pattern pieces. You can enter full screen mode by clicking View Full Screen or pressing Control/command+ L. You can exit full screen mode at any time by pressing Esc.
Did your pattern stay are the same zoom percentage you typed or did it zoom out to show the entire pattern (fit to page)? If your zoom percentage changed when you went to full screen mode, then you need to edit some preferences. Below I will walk you through common preference changes in Adobe for sewing with projector patterns.
Preferences for Pattern Projecting
Sewists that have already been using PDF patterns to print and tape patterns together have used many of the previous steps already. Setting preferences for pattern projecting in Adobe will make a large difference in the ease of pattern projecting.
Setting preferences in Adobe specific for pattern projecting will help you to fall in love with cutting patterns all over again! Follow each of these tips
Zoom Preferences
To ensure that your projector pattern stays at the correct calibrated zoom percentage that you type in, you need to edit your preferences.
“Old” Adobe Preferences
Go to the menu at the top of Adobe and click Edit>preference>Full Screen. Next, un-check the box next to “fill screen with one page at a time” and click “Okay” at the bottom of the popup screen.
“New” Adobe Preferences
To access the preferences menu in the “New” Adobe, go to the hamburger menu on the top left. Menu>Preferences.
The shortcut to the preference menu is the same in both the old and new Adobe Acrobat reader programs: CTRL+K.
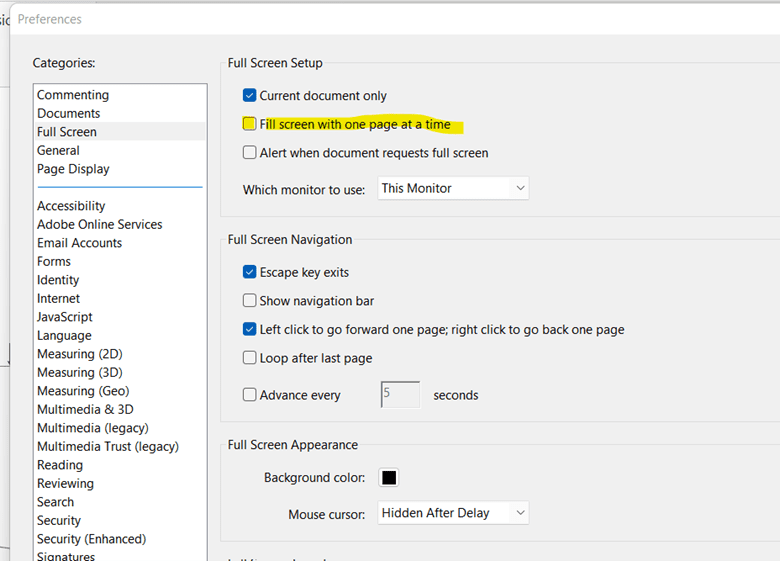
Now when you enter full screen mode, your zoom percentage will not change. On your keyboard press Control/Command +Y and the zoom box will appear. Type or check that the zoom percentage is correct at your calibration percent!
Reverse Document Colors
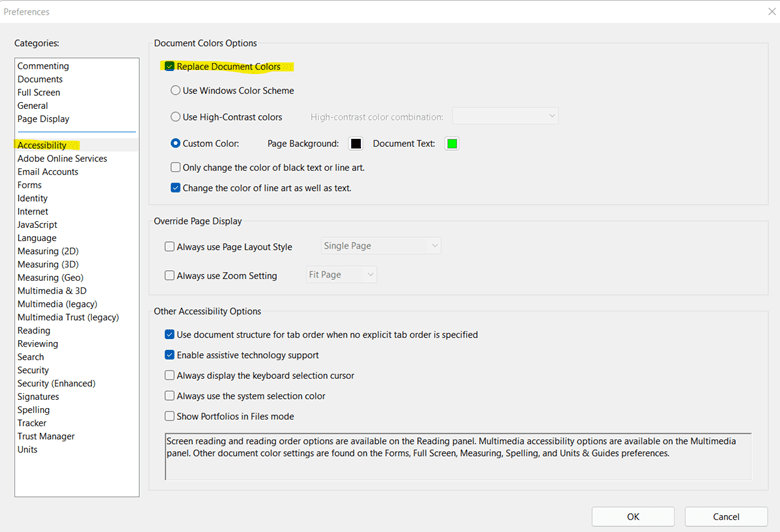
Are you cutting in a bright room or do you have difficulty seeing the lines on the pattern? Then, this next tip is for you! You can reverse the document colors on a pattern. I like to make the background black and the lines bright green, but you can really do any color you wish. Along with brightness adjustments on your projector, this should help you to see a pattern even in brighter rooms.
To reverse document colors in Adobe go to the top menu and select Edit>Preferences. In the preferences pop-up, select Accessibility. Check the box next to “Replace document colors”. You can also change the colors next to page background and document text. Or, you can select “Use high-contrast colors”. Play around with the colors to see what you like best! Select “Change the color of line art as well as text” for the best results.
You can also access the preferences panel in full screen mode by pressing Cntrl/Cmd + K. This makes it easy to quickly inverse document colors as needed.
Conclusion
By now you are on your way to becoming an expert at projecting patterns in Adobe. Adobe is a simple and free software that will allow you to do so much in the world of projecting patterns.
I hope you have found these tips useful, clear, and concise! Jump right in an start using Adobe for pattern projecting!
Have you ever wondered how to annotate or grade patterns that are projected? Sure, you can use another program or trace it out on the material. However, Adobe has all the tools you need for free!
If you are ready for the next step, head on over to learn all about annotations in Adobe for projector patterns!


