*This post may contain affiliate links and we may earn a small commission if you click on them.
Are you new to using Abode Acrobat Reader (free) for sewing patterns? Accessing layers in Adobe Acrobrat Reader is a basic skill that you need for sewing.
Let’s walk you through how to access layers in Adobe Acrobat Reader!
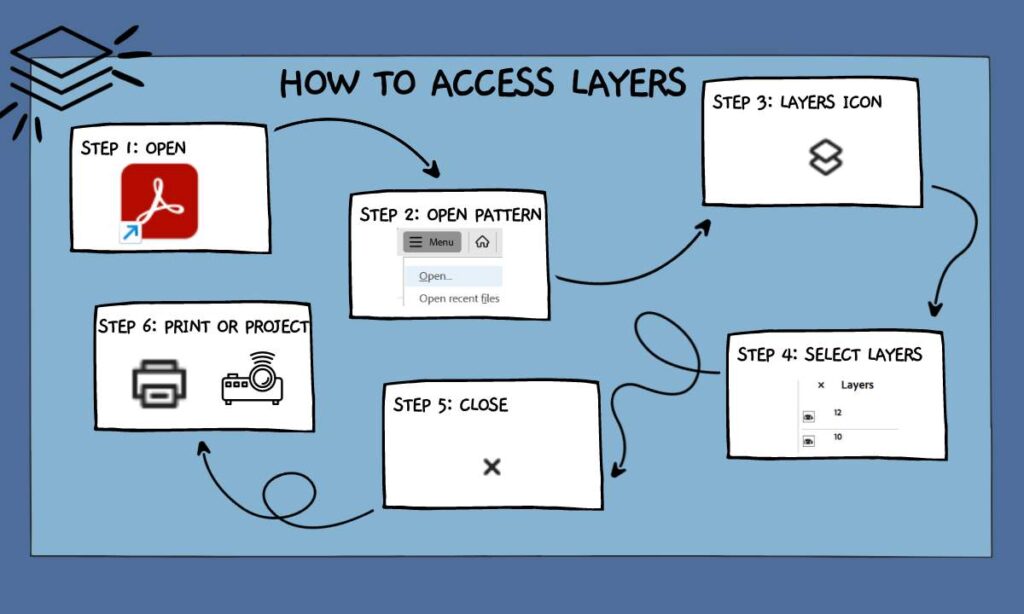
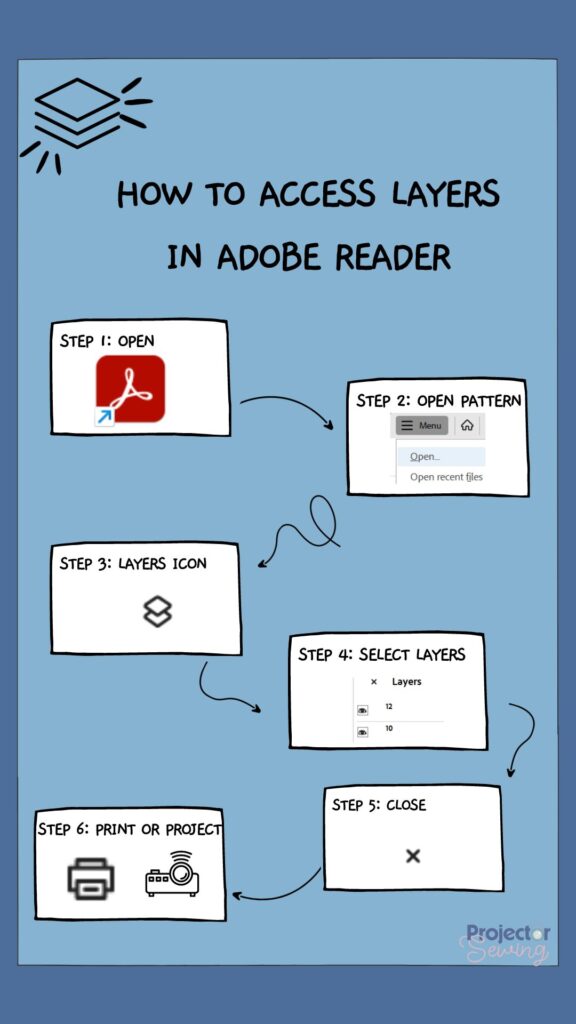
Step 1: Open the Adobe Acrobat Reader App on Your Computer
Double-click the app on your computer home screen to open Adobe Acrobat Reader. If you do not have the free version of Adobe Acrobat Reader, you can download it HERE.
If you are using the mobile app, you will not have access to the layers feature. I suggest using Xodo on a tablet or phone for viewing sewing patterns.
Step 2: Open the PDF Sewing Pattern
Next, open the sewing pattern (or PDF file) that you would like to view. You can do this by going to Menu>Open. The PDF file must be saved to your computer.
Step 3: Click the Layers Icon
Look at the right-hand side of the screen once your pattern is open. On the right tool bar, at the top, you will see an icon that looks like two squares stacked on top of each other. This is the layers icon.

If a pattern has layers, you will see them all listed when you click this icon. If there is only one “layer” that shows up and nothing else, you have a 1-size pattern or non-layered file.

*Adobe Acrobat Reader cannot create layers if they were not included in the original file. A work around for projector sewing is to use the comment/draw tools to trace around the size you need emphasized. Or take the pattern to Inkscape or Affinity Designer to create layers or delete sizes you don’t need.
Step 4: Turn Layers On and Off
Next to each visible layer, you will see a picture of an eye. Click the eye and the visibility of the layer will turn off.
Turn off as many layers as you need. If you are grading between two sizes, leave those two sizes visible for grading.
A layer that has a lock next to it means that you cannot toggle the visibility on or off for that layer.
Step 5: Close the Layer Panel
Once you are finished with the layer panel, you can close it by pressing the “X” or clicking on the layers icon again.
Step 6: Print or Project Your Pattern
Now that you have the layers selected that you want, you can print the pattern (if you are using the print-at-home sewing file) or project the pattern.
Using layers on a sewing pattern is essential for projector sewing. It allows you to see the size you are cutting clearly. You can also blend sizes “on the fly” by projecting two sizes at once.
Unlayered files are very difficult to use on a projector.
Many indie pattern companies offer layered sewing patterns. If you come across a company that doesn’t have layered sewing patterns, email them with your desire that they should include layers in their sewing patterns.
Ditto users should note that turning layers on and off in Adobe will NOT change which layers import into the BYOP feature. To do this, you will need to use a program such as PDF Stitcher.
And now you know how to access layers in Adobe Acrobat Reader! Layers help you to focus on the size you need, blend between sizes, and more!
Make sure to check out more Adobe Tips by reading this Get Started with Adobe for Sewing.
