Last updated on April 6th, 2023 at 03:55 pm
*This post may contain affiliate links and we may earn a small commission if you click on them.
Well hello there, my fashionable friend! So, you’re looking to make some adjustments to your knit bodice pattern to accommodate your lovely curves? Fear not, my dear, because with a little know-how we’ll have you looking fabulous in no time!
The best part of this special tutorial is that I will show you how to do all of these adjustments digitally! (But, you can use paper too!)
Making digital pattern adjustments are ideal to sewing with a projector. Haven’t heard of sewing with a projector? Then, you need to check out the GET STARTED page. Projector sewing has changed the sewing lives of so many. It truly is a time and money saver!
Now, let’s get on with the tutorial on how to do a digital full bust adjustment on knits. It’s called a Full Bust Adjustment, or FBA for short. Basically, we’re going to be making some room for your gorgeous curves, without sacrificing the fit around the rest of your body. It’s like giving your bust its own little VIP section!
This method will not use darts and is perfect for those stretchy knit fabrics! YAY! If you are sewing a top that does have darts, I suggest checking out this FBA tutorial on a bodice with darts in Inkscape or Affinity Designer.
This tutorial is a digital adaptation of the rotation and pivot method explained on Tilly and the Buttons or Oliverands.
Prepare: Determine how much to add to the bust
The amount that needs to be added to the bust to make a full bust adjustment will depend on your individual measurements and the pattern you are using.
To determine the amount to add, you will need to measure your high bust (the measurement around the fullest part of your bust, just under your armpits) and your full bust (the measurement around the fullest part of your bust).
Subtract your high bust measurement from your full bust measurement. The difference between the two measurements is your bust adjustment measurement.
Many standard-size patterns are drafted for a B cup, you will take your upper bust measurement and add 2 inches. Choose a size based on this new “bust” measurement. If your pattern has upper bust measurements, you can also use this to determine size!
Another way to figure out the pattern bust size is to measure the pattern around the bust and subtract any seam allowance.
The difference between the pattern bust measurement and your bust measurement will determine how much you need to add to the bust area.
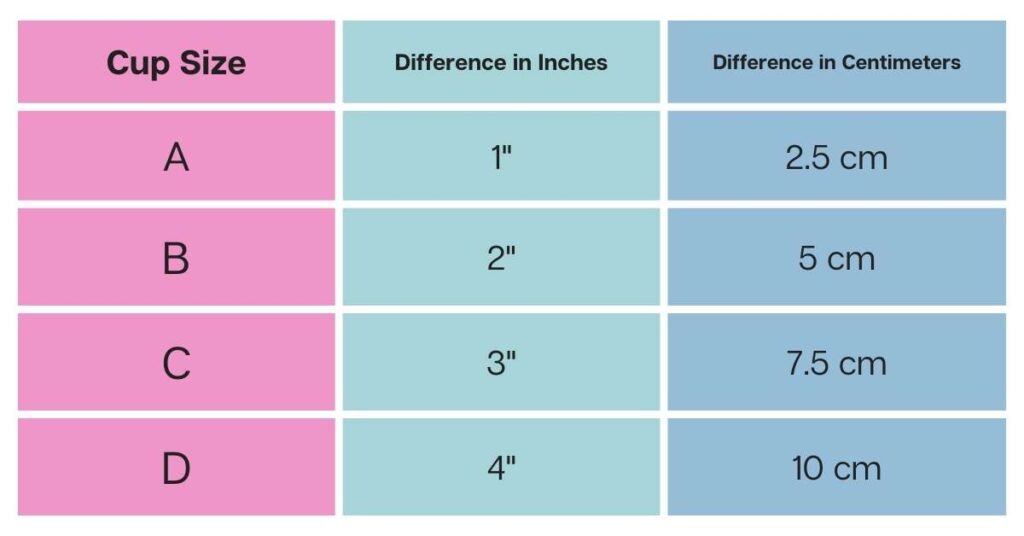
*For knit and stretchy fabric, we can add this amount to the side seam and armholes of the front and back bodices.
Divide the amount you need to add to the bust by 4.
For example, if I needed to add 2 inches to the bust on a pattern, I would do 2 divided by 4 and get ½ inch. I will be adding 1/2in to the side seams on the front and back bodices. We will be working with half of the pattern piece, assuming it is cut on the fold.

Inkscape Master Class
Are you ready to master Inkscape? Stop searching and start learning! This Logos By Nick Inkscape Master class comes highly recommended!
“This is what I used to learn Inkscape! Although it is not sewing specific, I found it so helpful for getting started!” -Sheredith
This course includes 50+ videos that walk you through the tools and how to use it to do just what you want.

Affinity Designer Master Class
Learn to master Affinity Designer with the program that Sheredith from Projector Sewing started with!
“I highly recommend this course to anyone that is new to Affinity Designer! Although it is not sewing specific, this class is invaluable to getting started.” -Sheredith
This Logos By Nick master class contains 60+ explainer videos that go over every tool and feature of Affinity Designer.
Get lifetime access for only $17!
Step 1: Duplicate the pattern and measure
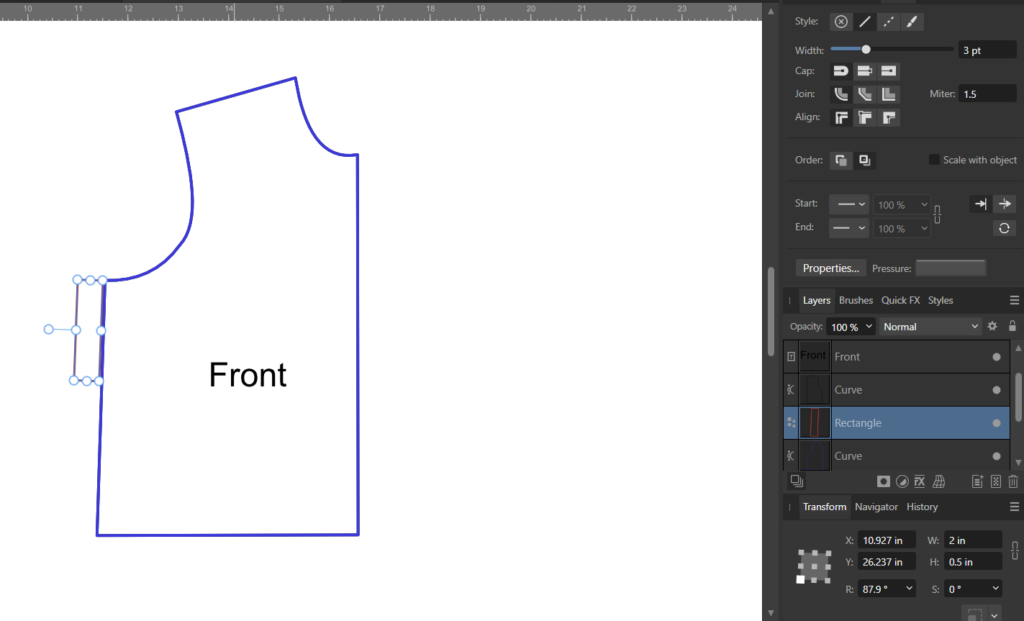
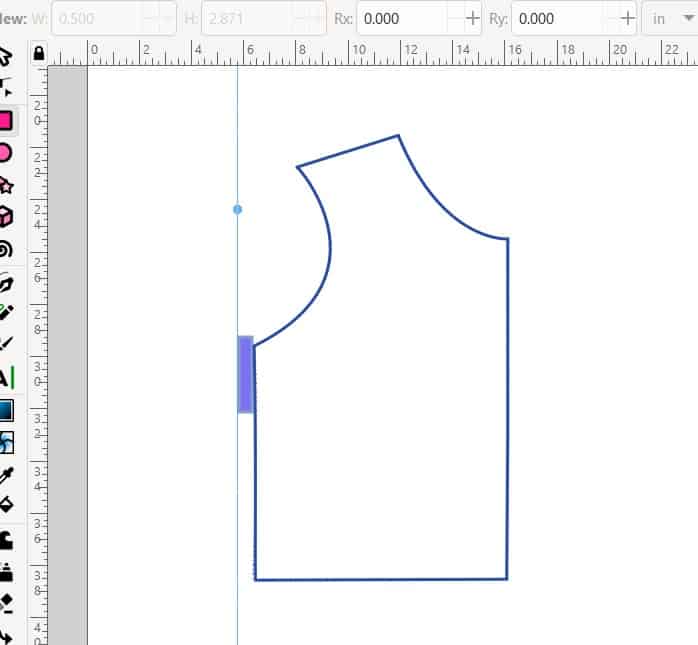
Working in Inkscape or Affinity Designer, take your front pattern piece and duplicate it. Now, measure out the amount you need to add. In my example, I am adding 1/2in.
You can use guidelines to measure, but the fastest most accurate way I have found is to just draw a rectangle and use the transform box is input the amount.
Step 2: Rotate Pattern
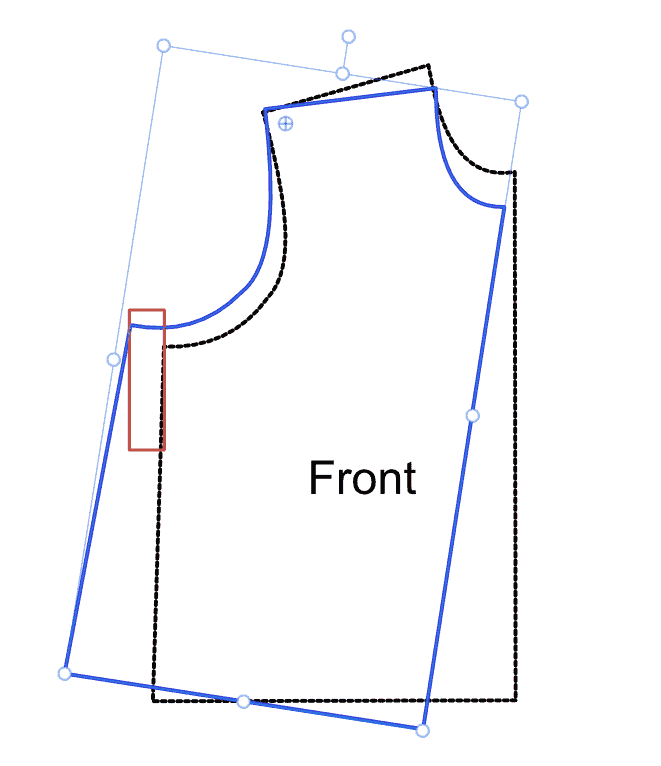
Next, you will use the transform-origin with your move tool. Place a pivot point in the top shoulder near the armhole at the seam allowance line.
Rotate the pattern until the side seam meets the measured line you drew.
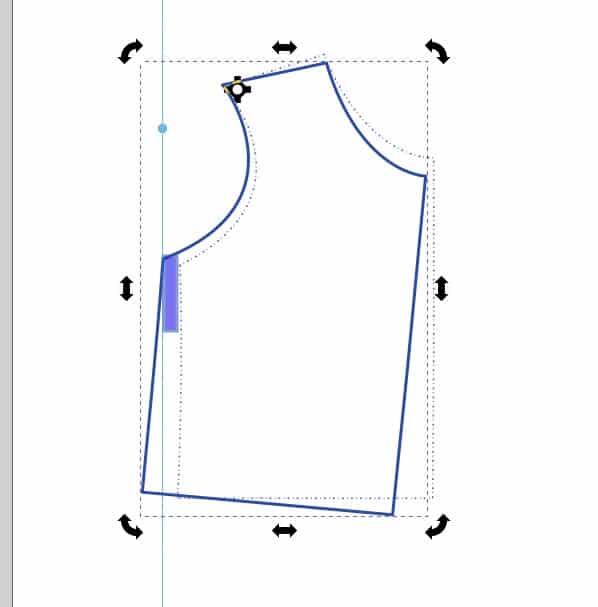
Step 3: Draw the Armhole
Use the pattern piece that was rotated to draw a new armscye. I use the node tool and move the lines of the original pattern line, but you can also use the pen tool to draw the arm hole.
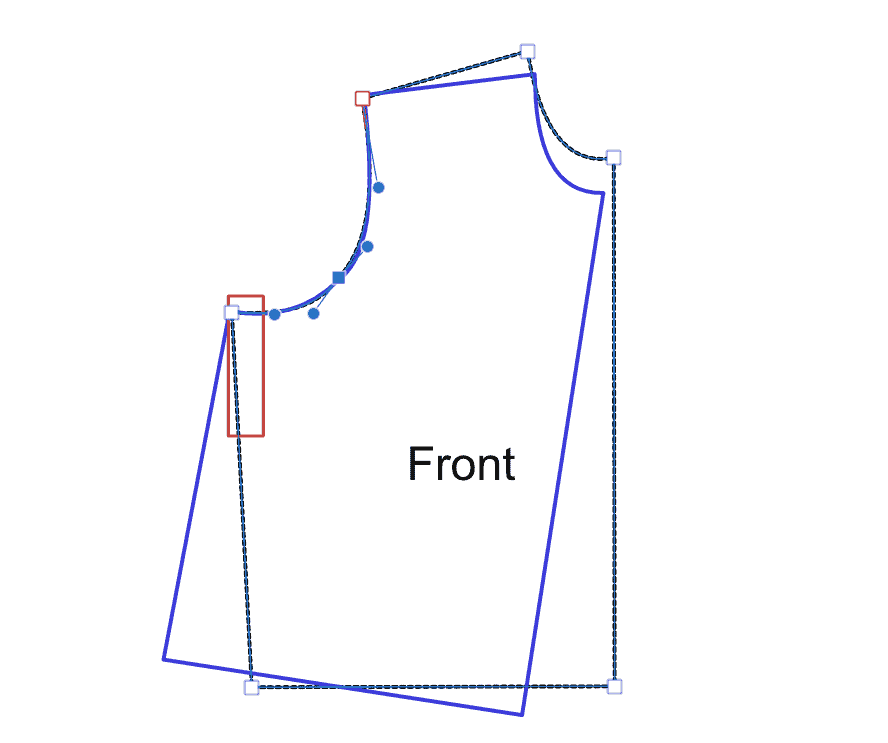
Step 4: Rotate Again
Now, move the pivot point to the bottom of the armpit near the side seam. Rotate the pattern until the hemline meets the original center front of the pattern.
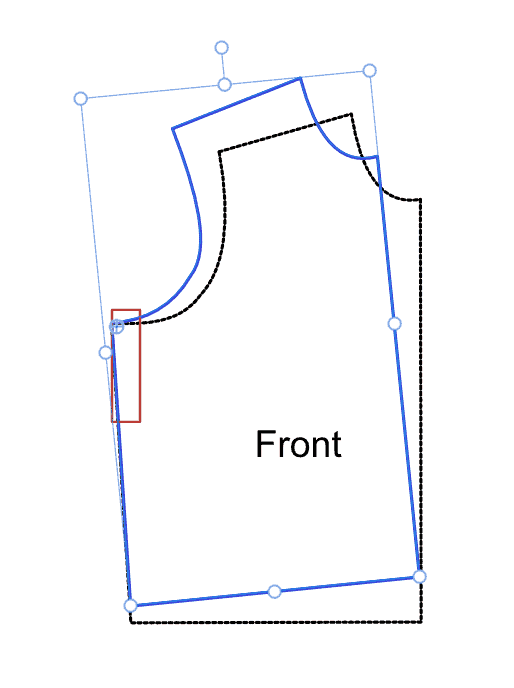
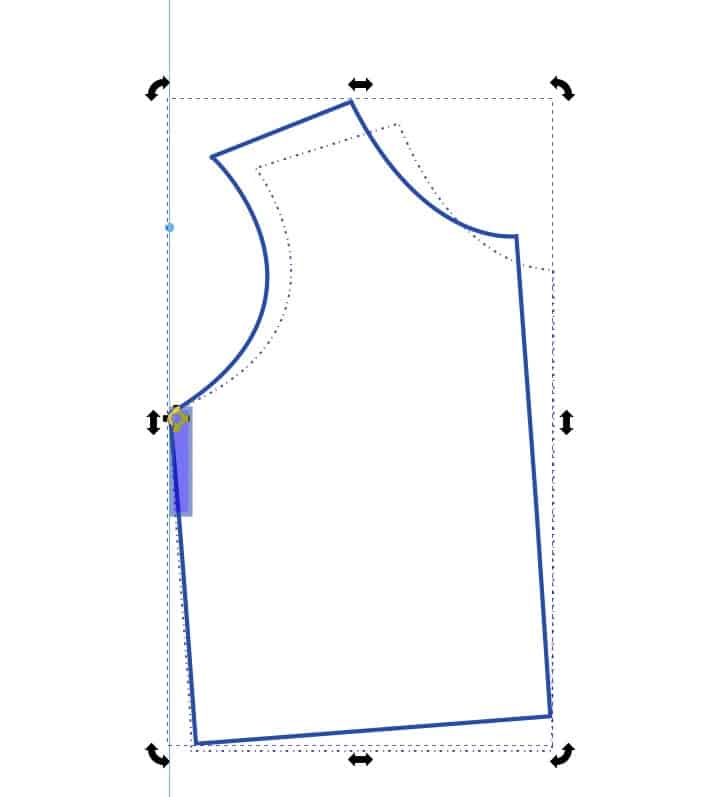
Step 5: Redraw the side seam
Use the side seam of the pattern that was rotated to draw a new side seam line. Since I already moved the armhole of the original pattern, I noticed the side seam was already mostly correct too. Make any adjustments to the side seam as needed.
Step 6: Cleanup Full Bust Adjustment Pattern
Finally, you can delete the pattern piece that you used to rotate. Connect the original pattern piece with the new arm and side seams. Delete old side seam and armscye lines.
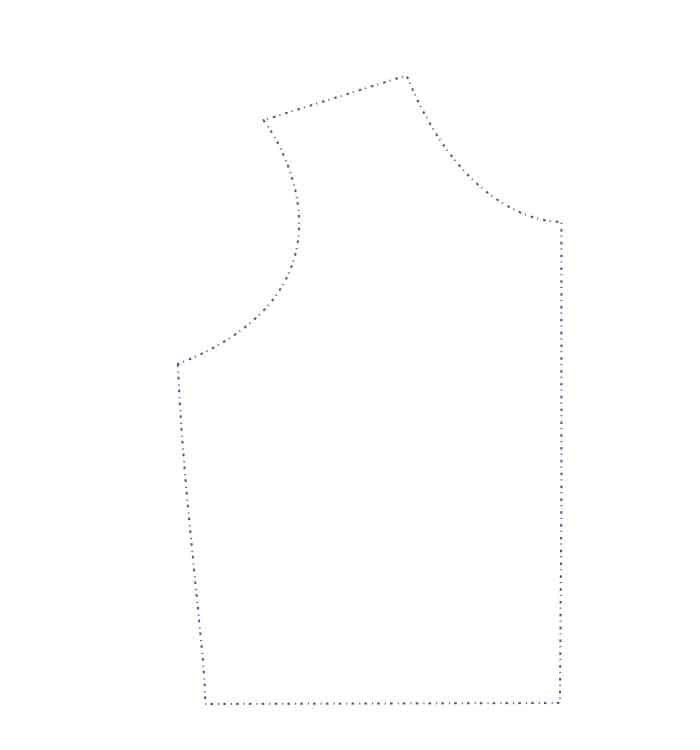
Step 7: Repeat these steps on the back bodice
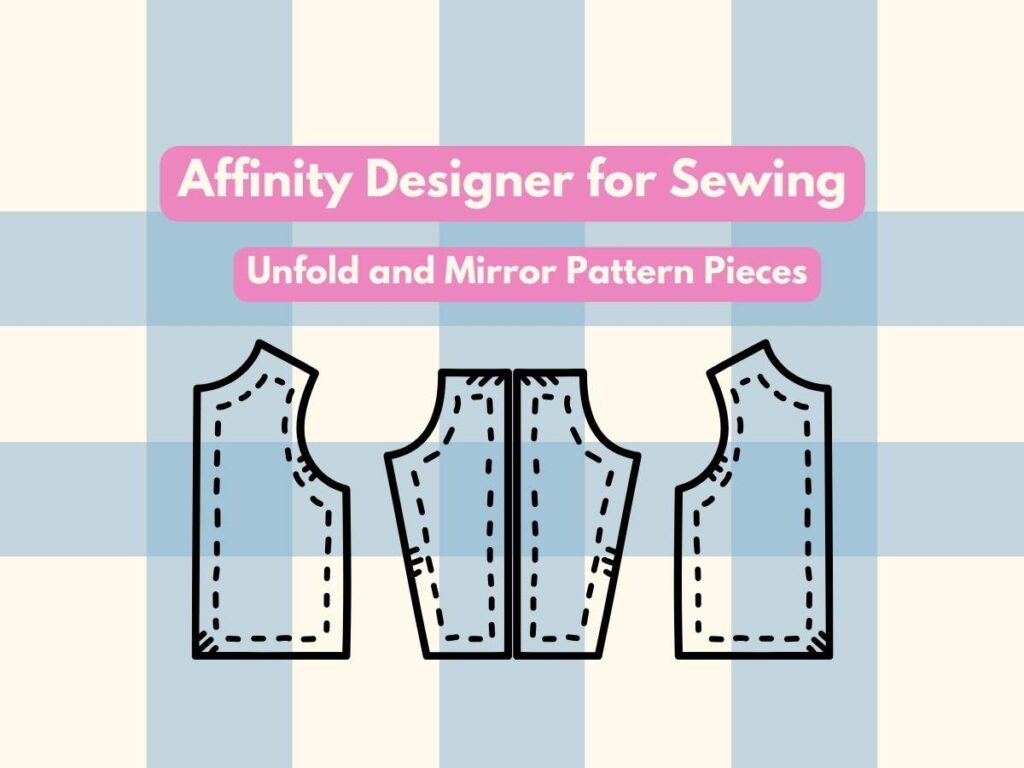
Repeat these same steps on the back bodice quarter piece. Do these steps before “unfolding” pattern pieces. Once the adjustments are made, you can cut on the fold or “unfold”.
*For most FBA adjustments using the pivot and slide method, length does not need to be added, but I always suggest making a muslin first.
So there you have it, my lovely friend, a digital full bust adjustment on knits. With a little can-do attitude, you’re well on your way to creating a knit bodice that perfectly showcases all your amazing curves.
Happy sewing!
If you loved this tutorial on how to do a digital full bust adjustment on knits, please consider sharing it with your friends and leaving a comment below!




I’m sorry, but this is not good advice. Unless you have a fat back to go with your large bust, you need to add to the front only, and leave the back alone. So instead of dividing the extra in 4, divide in 2 and add them to the front. Also, it doesn’t look like you’re adding as much length to the front as you’re adding in width, and that’s a huge lack. Most breasts are roughly spherical 😉
Are you familiar with the Pivot and Slide method used on knits? There are several tutorials online and it has been used with success. (I did not come up with this method.) Most of the time you do not need to add length unless you have more than a 2-cup difference from your chosen pattern size. But, I always recommend making a muslin first. You can definitely use the traditional dart method on knits and only make the adjustment to the front too as shown in this tutorial: https://projectorsewing.com/full-bust-adjustment/