Last updated on January 6th, 2023 at 01:42 pm
*This post may contain affiliate links and we may earn a small commission if you click on them.
Now that you have switched to sewing with a projector, you wonder how to make all the pattern adjustments you did on paper. Even a full bust adjustment with a dart can be done digitally!
Affinity Designer 2 makes it easy to work with pattern pieces in a way sewists are familiar.
This tutorial will guide you on how to digitally make a full bust adjustment. However, I will not be going over the details on how to complete this type of adjustment on a pattern.
For full details on how to make a full bust adjustment refer to this Curvy Collective tutorial or this Ellie and Mac tutorial.
I will be using the measurements from the Curvy collective tutorial for this technical explanation.
Pull up a pattern with a dart to practice on and follow along! I will be using the Duchess Jacket by Ellie and Mac.
Full Bust Adjustment Video Tutorial
Step 1: Duplicate the Top
You the move tool (V) to drag over the entire bodice and select all pieces. Press CTRL+J to duplicate (Command+J on Mac). Duplicating the bodice will make the last steps a lot easier!
Step 2: Fill Bodice
Next, fill the bodice piece will a color of your choice.
Filling the bodice will make it easier to see the pieces as we are cutting and moving them.
To fill the bodice, select the piece. In the color panel, choose a fill color for the solid circle.
Step 3: Measure and Draw in Bust Point
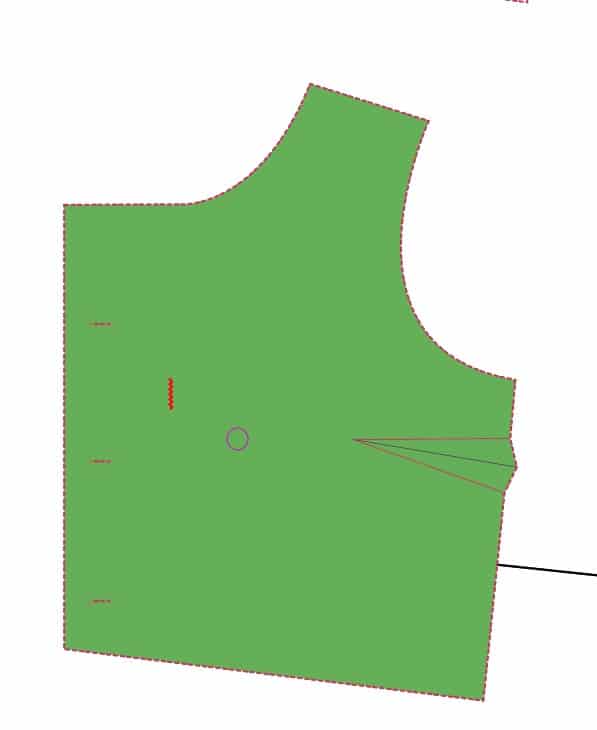
Follow the steps in the Curvy Tutorial to measure your bust point.
To accurately place the bust point on your pattern, you can use the measure tool in Affinity and a real-life measuring tape.
Or you can trace the pattern, hold it up to you, and mark the bust point. Then, put the tracing back down on your projection with Affinity scaled to the pattern and mark the bust point in Affinity.
Step 4: Guidelines
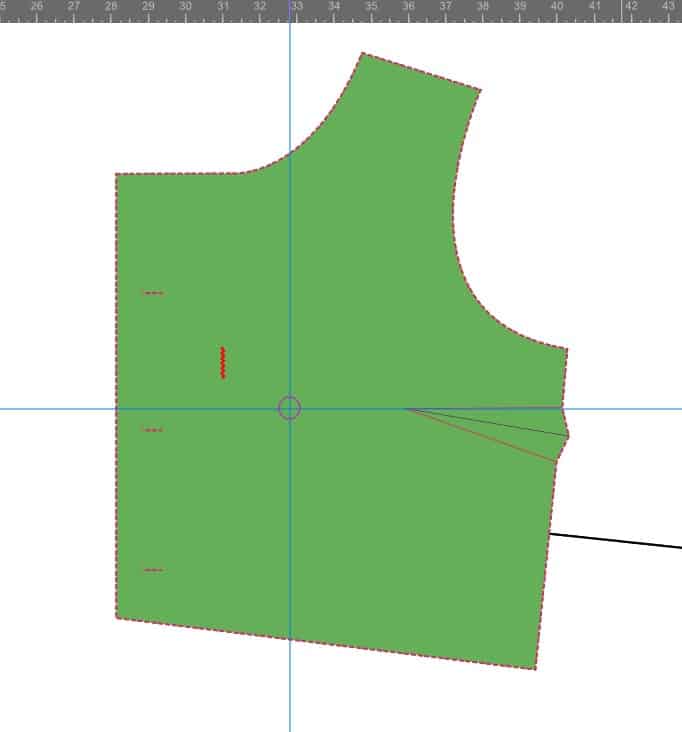
Using the move tool (V), click and drag on the ruler at the top of the page. A blue “guideline” will appear. Line it up with your bust point and the dart point.
Create a vertical guideline using the left ruler and drag to the center of the bust point.
Step 5: Draw Center of Dart to Center of Bust Point
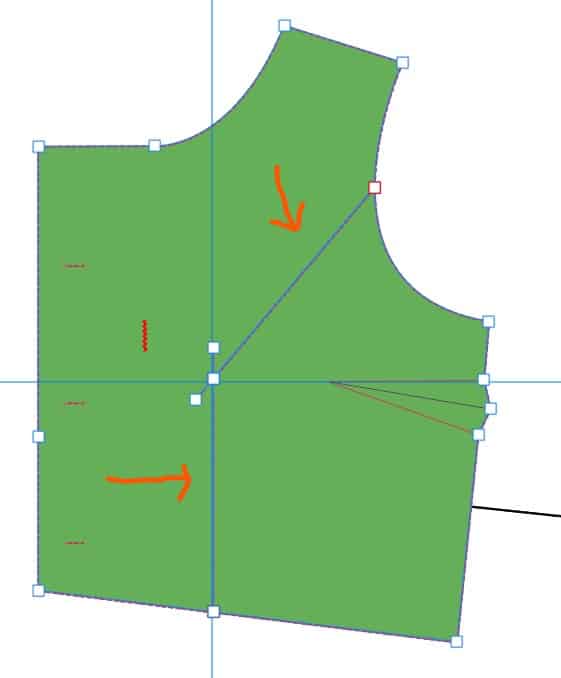
Use the pen tool (P) to draw down the center of the side dart, then to the center of the bust point.
Using the pen tool, just click on the three points and the line should be completed. Press ESC when the line is complete.
Step 6: Begin Cuts
Select the bodice and the line you drew in step 5. Only the lines selected will be affected by the knife tool.
Use the knife tool (K) to cut from the waist to the bust point. Then again from about 1/3 down the armscye to the bust point.
Use Shift+Alt while cutting with the knife to make a straight line.
Step 7: Rotate from Armscye
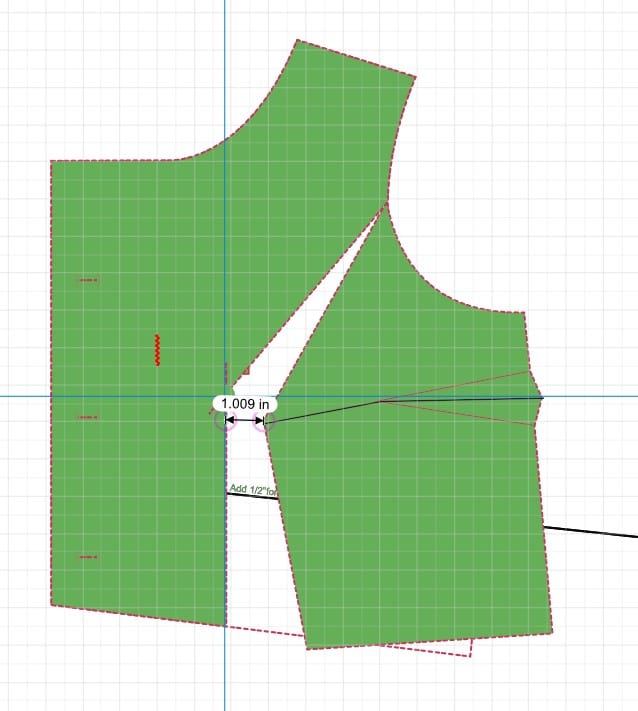
Use the move tool (V) with “Transform Origin” enabled to pivot the piece at the armscye.
Separate the piece the amount you need. In the example I am using, that is 1 inch.
You can turn on the grid that will show units, use the blue guidelines, or use the measure tool to check the distance.
Another option is to draw a rectangle that is exactly the width of the distance that you need. Use the transform box to type in the dimensions of the rectangle.
Step 8: Cut Bust Dart and Bottom Piece
Use the knife tool (K) again to cut where you drew the line in step 5.
Pivot using the move tool and transform-origin.
Use the grids and measure tool to make sure the piece is moved for how much you need. In the example, I have a 1-inch gap.
Pivot from the bust dart until the waist seam lines up with the original waist seam line.
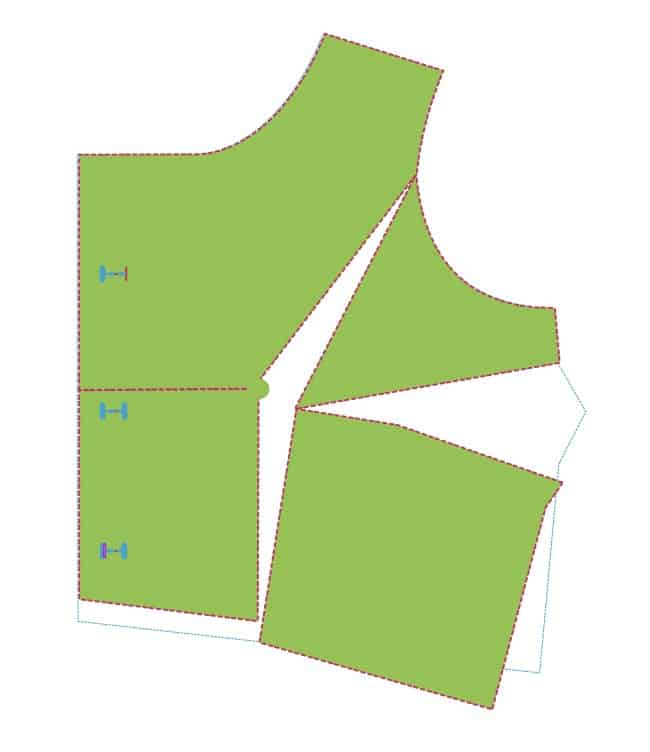
Step 9: Cut and Move
Now select the left side of the bodice, chose the knife tool, and cut a horizontal line from the bust point to the center of bodice.
Move this piece down until it lines up with the right piece that was already moved.
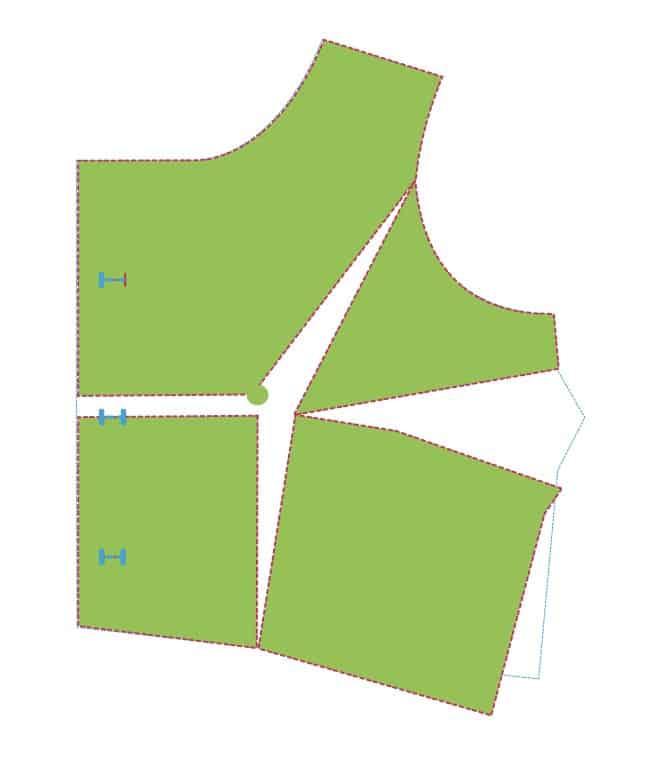
Step 10: Draw Bust Dart
Next, you will need to redraw the bust dart. Start by using the pen tool to connect the dart legs to the center of your bust point.
Then, move the apex of the dart away from the bust center point the correct distance. Use the tutorials to know which distance you should start the dart from the bust point. In the example, I used 2 inches.
You can use the blue grid guidelines to measure distance between, the measure tool, or draw a rectangle to measure from the center of the bust point to the apex of the new dart.
Step 11: True Up the New Bodice
Click on the original bodice piece that you duplicated in step 1.
Use the node tool (A) to line the nodes up on your modified bodice shape. Turning off the grid will prevent snapping to the grid.
You will also need to true up the bodice dart so that the material will overlap correctly.
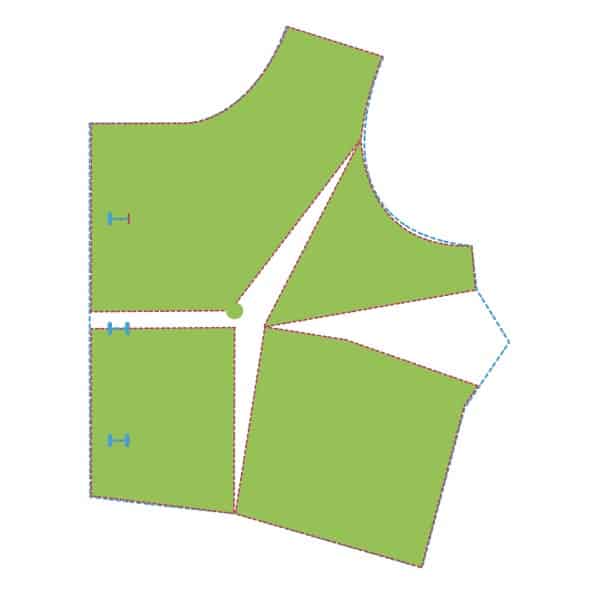
How to True up the Bust Dart
Truing up the bust dart can sound complicated at first. You want to make sure that when the dart is sewn in that you have material to attach in the side seams. You can choose to fold it up or down. In the steps below I will be folding it up, but you can do the opposite to fold it down.
- Draw a line to connect the top bust leg point (where the dart meets the side seam) with the bottom bust leg.
- Use the transform box in the right studio to divide the line in 2. Use the height of the line (h) and just type /2 (divide 2) after the value. It will divide the line directly in half. Move the line, if necessary to the top dart leg.
- Use the pen tool to draw a triangle connecting the ends of the line you drew to the dart apex.
- Select the triangle. Move the transform origin to the dart apex. Rotate the triangle until it lines up with the bottom dart leg.
- Move the outside corners of the triangle to meet the side seam.
- Return the triangle to its original position. Duplicate and reflect to create the other dart half.
- You may need to adjust the nodes on the bodice to meet the dart leg. This shouldn’t change the side seam, but I do recommend measuring the side seam on the adjusted bodice and compare to the original.
Step 12: Clean up
Now you can clean up the pattern. Delete any parts you don’t need and clean up the pattern piece. Make sure to label the pattern piece with the FBA that you did, so you can remember it later!
Don’t forget to always make a muslin to test out your adjustments!
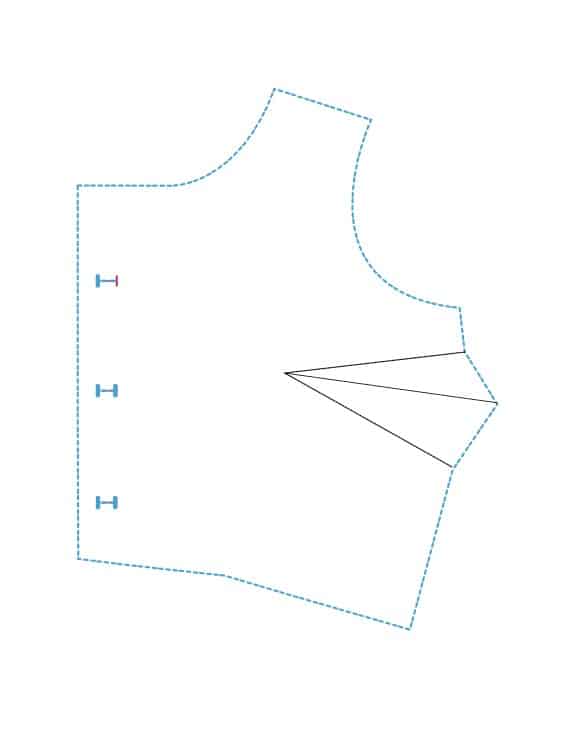
Congratulations! Now you completed a traditional dart full-bust adjustment digitally in Affinity Designer 2!
If you found this tutorial helpful, please share on social media and with your friends!
As always, Happy Sewing!


