*This post may contain affiliate links and we may earn a small commission if you click on them.
Inkscape has long been the go-to digital pattern editing program for many projection sewists. It is a powerful vector-editing program and best of all it is FREE!
In the past, one of the downsides is the frequent crashing of the program. Well, now version 1.2 of Inkscape is out!
Many new features have been added along with bug and crash fixes! Yay!
So, if you would like to make digital adjustments to your patterns, then give Inkscape a try! I have several tutorials available for Inkscape including How to Unfold, Pattern Tetris, and Digital Grading.
Get Started with Inkscape 1.2
Before downloading version 1.2, make sure to uninstall any previous versions of Inkscape that you may have on your computer. If this is your first time using Inkscape, then carry on!
Uninstall on Windows
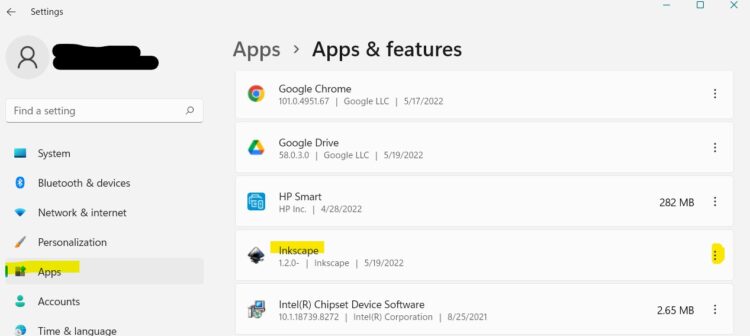
Before downloading Inkscape 1.2 for sewing purposes, it is best to uninstall old versions of the program. To uninstall an app on Windows, go to the settings menu. Click on the “Apps” button on the left and select “Apps & Features”. Scroll down until you find “Inkscape”. Click the three dots on the right-hand side and choose “Uninstall”.
Uninstall on Mac
On a Mac, go to the Finder (blue and white smiley face). On the left menu, choose “Applications”. Find Inkscape and open the folder, there should be an “uninstall” file. Click on that and follow the on-screen prompts. Or you can drag and drop the Inkscape main folder into the trash and empty the trash.
Download Inkscape Version 1.2
Inkscape can be downloaded on Windows, Mac, and Linux. When downloading in Windows, you will need to know if you have a 64-bit or 32-bit system. You can find this by going to Settings>About>System Type.
Go to Inskcape.org or click on this link to be taken to the download page.
Download Inkscape 1.2 | Inkscape
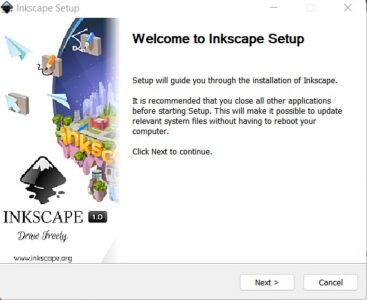
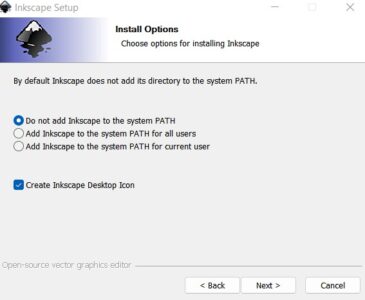
Select the operating system you have and the files will start downloading to your computer. To install click to open the .exe file that was downloaded. Follow the onscreen prompts to install the program. I recommend creating a shortcut to the program on your desktop while you install, but it can also be done later!
What is New for Inkscape 1.2 for Sewing?
There are a few different new features in Inkscape version 1.2. Of course, among these are the bug fixes! Which also means, less crashing! Let’s talk about the updated features that are useful for sewing.
Multipage Import and Single Page Export
Now you can import a multipage document into one canvas in Inkscape. This can be helpful for pattern files, such as large A0 files, that span across two or three pages. Just remember that you only want to export one page file for pattern projecting.
After importing a multipage document, you will need to save it as one page for it to be projector friendly. One way this can be done is when you are exporting the document. The way you export a document is a little bit different than before. Here are a few quick steps.
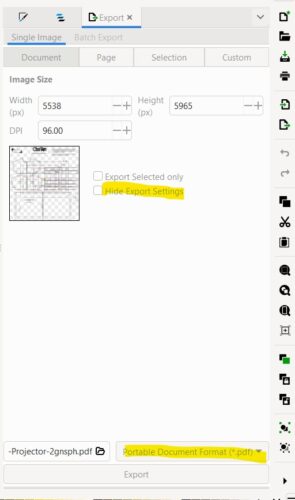
The easiest way to make a multi-page document one page is to go to File>Export>Single Image.
Uncheck “Hide export settings” in the document section of the export dialogue. Make sure to change the file format to PDF from the default PNG.
Then click export. In the dialogue box you can add margins or an empty buffer to the page by typing in the “bleed/margin” section.
Another way to delete extra pages is using the new tool described below!
Create/Edit Pages
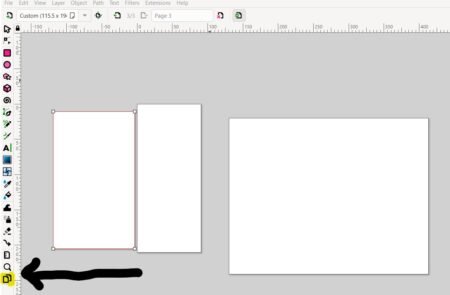
Look for the multi-page icon found on the left toolbar. When you click this, you can insert new pages into the document by drawing any size page on the canvas. You can also delete extra pages by clicking on them and pushing delete! This is a really cool tool to quickly create new pages and delete pages when you are working. I find it very intuitive.
If you were working on a multipage pattern and you were making it projectable, you can now delete extra pages and resize one page to fit all the pattern pieces. Very simple and quick!
Layers and Objects Dialogue
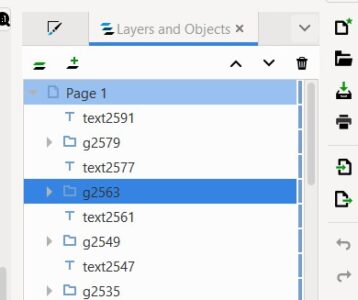
The layers and objects dialogue boxes are now combined. You can now also leave it open while working on the document without any major issues.
Try this! In a pattern file open in Inkscape, open the layers and objects dialogue box. Do this by selecting “Layer” in the top menu bar and selecting “Layers and Objects”. Select one of the layer and object elements and press “Alt”. It will highlight in the pattern what that object is!
Fill and Stroke
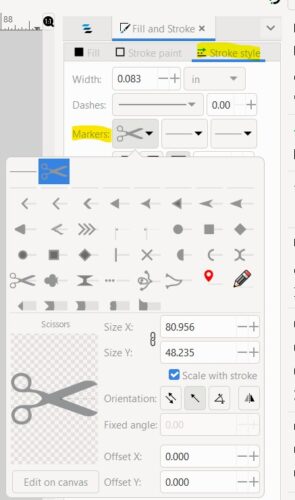
In the fill and stroke panel, you can now customize markers! In the top menu bar select Object>Fill and Stroke. The dialogue box will open on the right. Choose “stroke style” and click on “markers”. My favorite is the little scissors and I think they can come in handy when you are making notch marks. This same panel will allow you to scale your marker, rotate it, and flip it.
Toolbar
The left toolbar is now customizable. This means you can add or remove tools you want on the toolbar menu. You can also enlarge or reduce the size of the icons. Go to Edit>Preferences>Interface>Toolbars.
Conclusion
There you have a quick overview of the updated Inkscape 1.2 for sewing! If you are looking for video tutorials on everything Inkscape, I suggest following Marta Gvozdinkaya on YouTube. She is much more knowledgeable on the ins and outs of Inkscape and has many great tutorials out!
Jump in and start trying out Inkscape Version 1.2 for all your sewing needs. The more you work with the program, the easier it will be. Don’t forget to check out the Tutorials page for links on the latest tutorials!


