Last updated on April 9th, 2025 at 09:52 pm
Are you ready to ditch the PDF patterns and stop wasting your time printing, taping, and cutting your patterns? Then, you are in the right place!
It can be overwhelming, but exciting when you first learn about the world of sewing with projectors. Instead of searching through social media posts and the internet, we have compiled everything you need to start in a simple step-by-step process. We will walk you through selecting a projector, choosing a mount, setup, and calibration. You will be ready to sew in no time!
How to Use a Phone for Pattern Projecting
Easy! 3 Steps to Calibrate a Projector for Sewing
Project and Cut: Simple Sewing Projector Calibration Software
Step 1 Choose a Projector
The most important things to look for in a sewing projector are projectors that will work in the sewing space you have. You will need a projector that can focus within the vertical distance you have and will give you a desired image size.
Here at Projector Sewing we’ve created a tool to help you choose a projector. You will need to make a few measurements, but this will help you get the right projector for you!
All the current recommended projectors are listed on our Projectors page. The Reviews page has the individual projectors that we have reviewed in depth. Feel free to use the search tool on the home page to find if we have reviewed a projector you see on the list. Once you have chosen a projector, you are ready for step 2, mounting!
Step 2 Choose a Mount
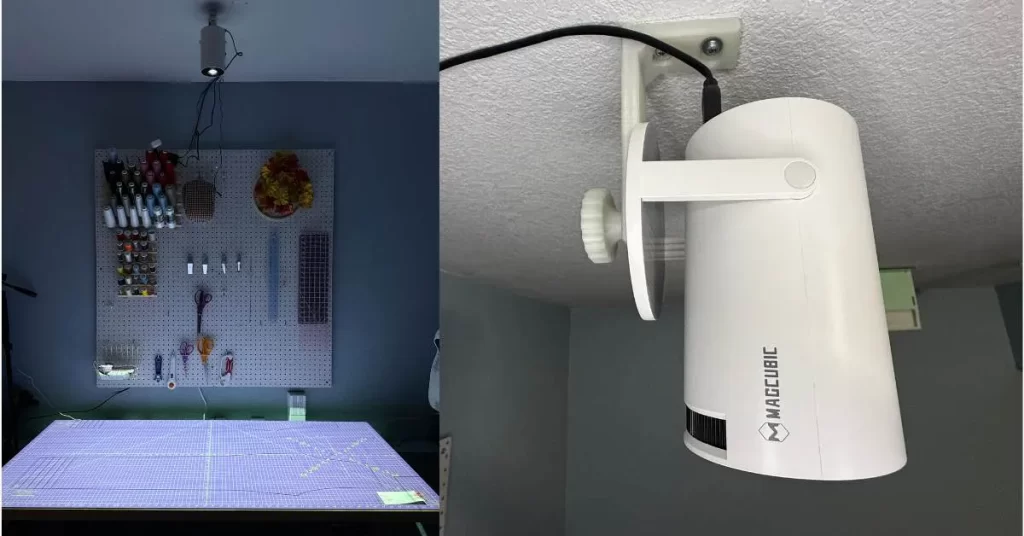
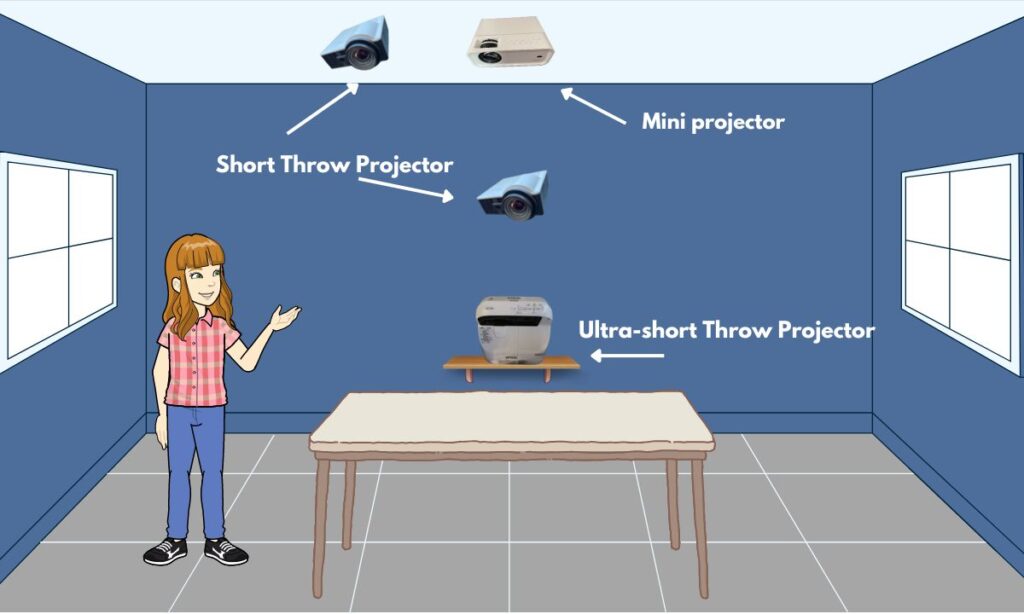
Depending on the type of projector you have will determine the best way to mount. Some projectors like mini and pico projectors have single-point mount holes in the back. Most ultra-short throws and some short throw projectors have 4 mount points.
This article is all about mounting projectors. The Galley page is another place to look at various mounting types. Or check out some options for “portable” or no hole mounts.
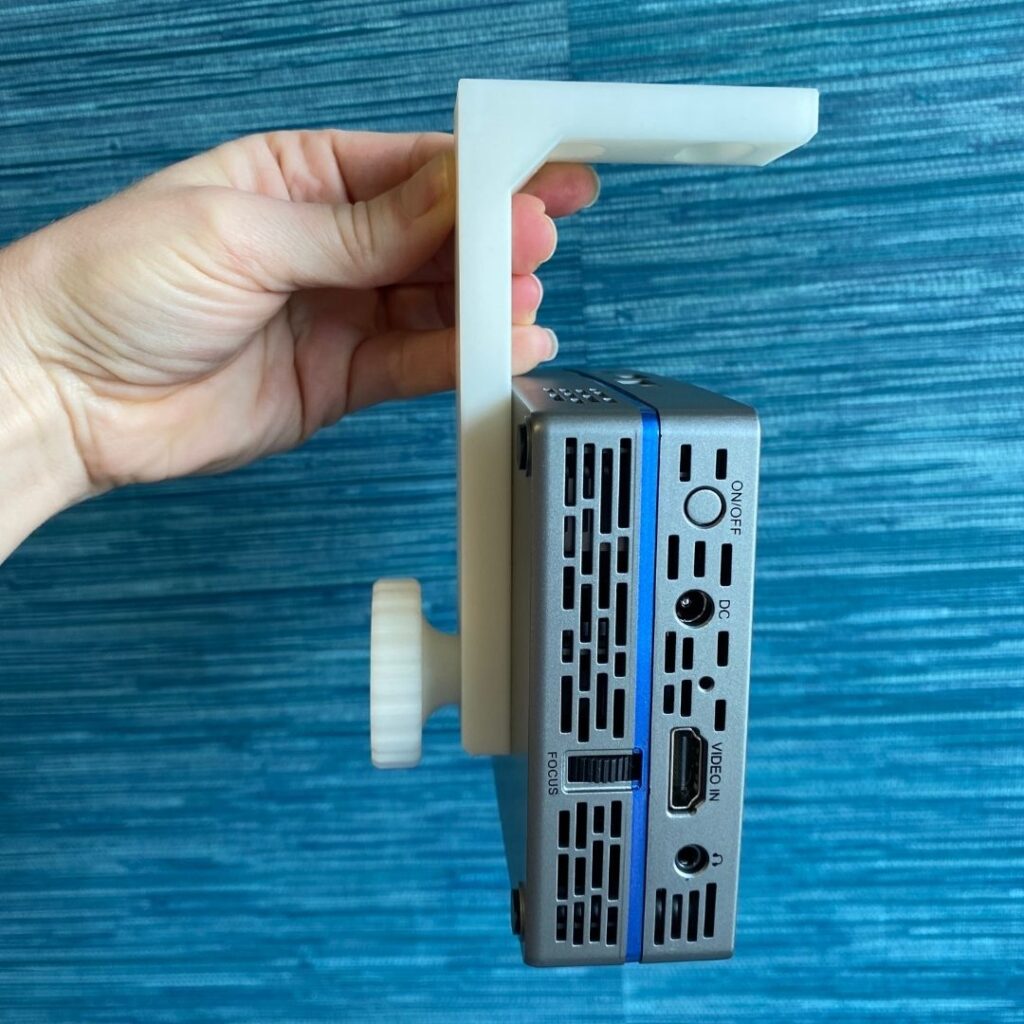
We highly recommend these custom sewing projector mounts!
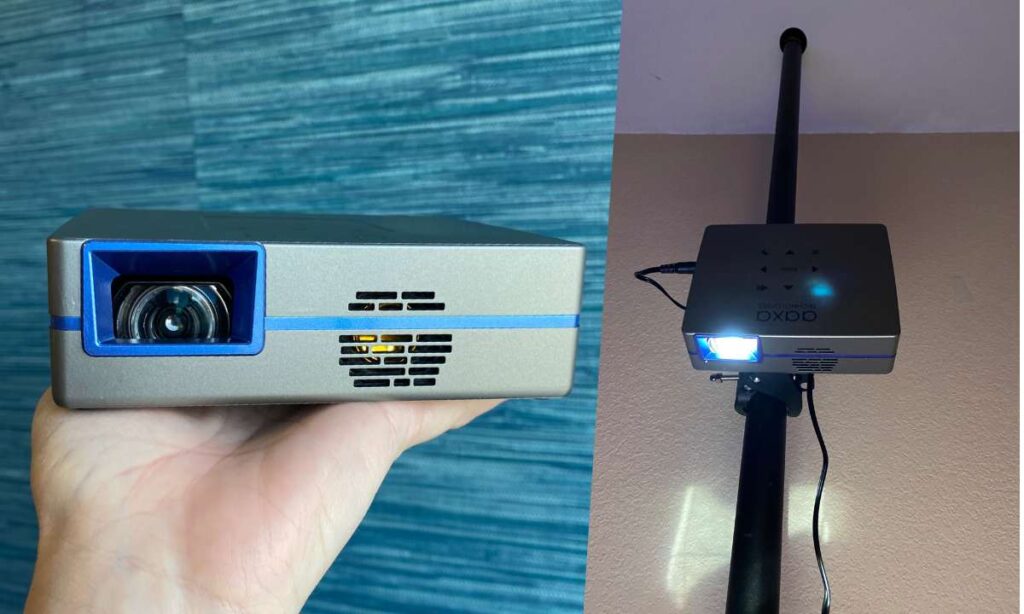
Mini Projectors: Mini projectors are typically mounted on the ceiling or wall to shine down on your cutting table. Again, there are a few variables here depending on what projector you have. If you have a compact mini projector that is 1 lb or less, then the typical ceiling mount with a ball joint will work just fine, but the custom mount above will work the best! Take a look at the article How to Mount a Projector for Sewing to see different types of mount setups.
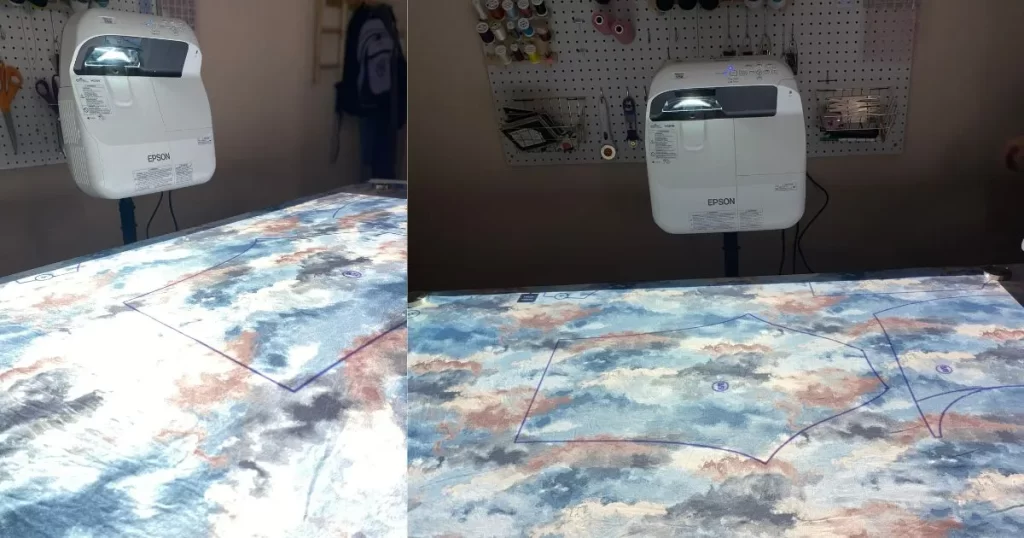
Ultra-Short Throw: Ultra short throw projectors do not need to be mounted on the ceiling. Instead, they are best put on the cutting table, a shelf by your sewing table, or on a portable TV stand.
| Preview | Product | Rating | Price | |
|---|---|---|---|---|
|
|
VIVO TV Floor Stand for 13 to 50 inch Flat… | $49.99 | Buy on Amazon |
Last update on 2025-12-15 / Affiliate links / Images from Amazon Product Advertising API
Short Throw: Short throw projectors are either mounted from the wall or ceiling. If you want to mount from the ceiling, make sure to check the maximum throw distance of the projector to see that it will work. For the top recommended short throw projectors the AAXA SLC450 and Optoma ML1050ST, you can use our custom printed sewing projector mount.
Step 3 Connect and Setup
Next choose a device you want to use to project patterns from. Projectors cannot be used independently to project sewing patterns. You will need a computer/laptop, Chromebook, tablet, iPad, or phone. Computers/laptops are the top choice for projecting from if you are getting a new device.
The most stable way to connect to a computer or device is using an HDMI cable. Make sure to get a long HDMI cable if you are mounting to the ceiling!
Wireless options include using Chromecast, Apple TV, Wireless HDMI, or a projector’s built-in WiFi. (Past experience has shown that built-in Wifi for mini projectors can sometimes be spotty.)
| Preview | Product | Rating | Price | |
|---|---|---|---|---|
|
|
Amazon Basics HDMI Cable, 15ft, 4K@60Hz,… |
$8.09
$7.10 |
Buy on Amazon | |
|
|
Chromecast with Google TV (HD) – Streaming… | $119.99 | Buy on Amazon | |
|
|
Wireless HDMI Transmitter and Receiver, Plug… |
$205.00
$105.65 |
Buy on Amazon |
Last update on 2025-12-15 / Affiliate links / Images from Amazon Product Advertising API
Next, proceed to mounting your sewing projector per manufacturer instruction to the ceiling, wall, stand, or table. Before attaching the projector to the mount, make sure the projector lens is level to the cutting surface as much as you can.
Cords can hang out of the way using command hooks. Longer power cords or HDMI cords can be purchase as necessary. Extension cords can be used for the power cord as well.
- Use 2 people
- Make sure your cutting surface is flat and doesn’t dip or bow
- Turn on the projector and adjust screen orientation in display menu
- Note satisfactory image size before calibration, raise your projector higher to increase image size
- Set up mount per manufactur instructions
Step 4 Calibrate Sewing Projector
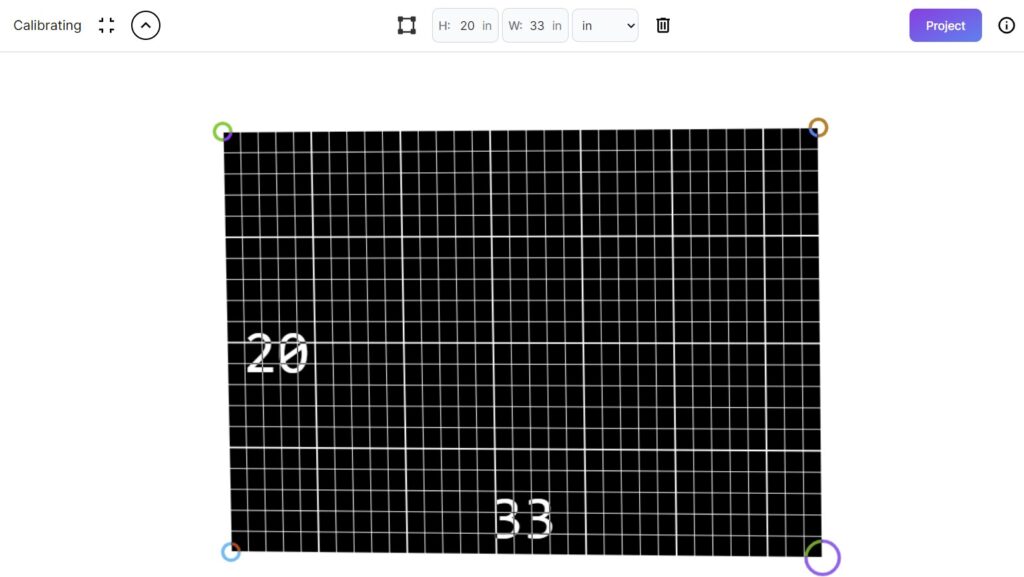
New calibration tools make it easier than ever to calibrate a projector for sewing!
The two tools are Project & Cut and Pattern Projector.
Project & Cut is available on Windows, Mac, and Linux systems. It has a free 21-day trail. A forever license is only $20US.
Pattern Projector is a web-based application and available on any device with access to the web. It is open source and free.
*Manual calibration is also an option if you’d like to project patterns from a different PDF reader such as Adobe Acrobat, Affinity Designer, or Inkscape.
Step 5 Cut Out a Pattern
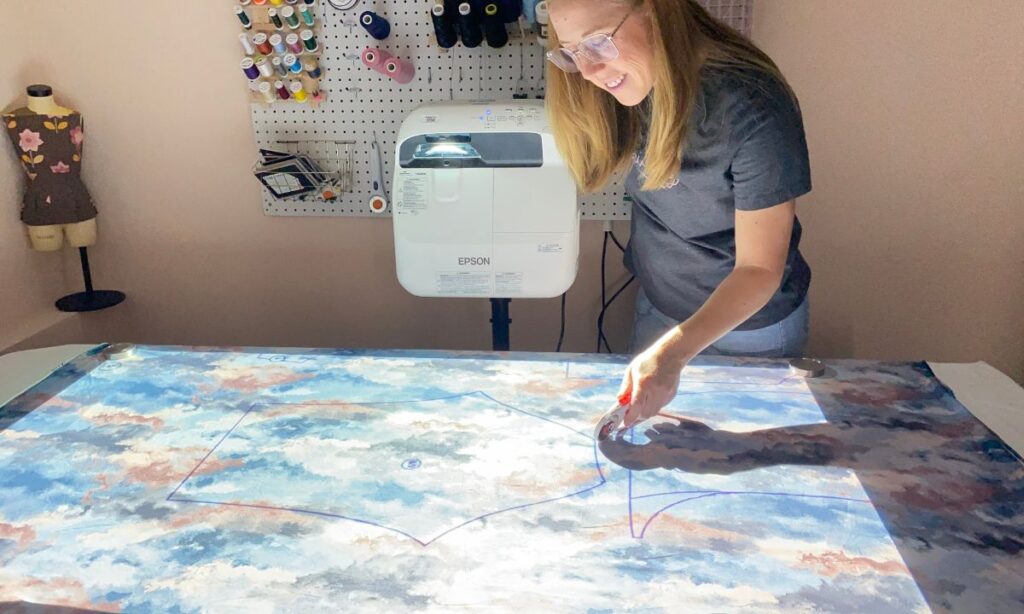
Now you are ready to start cutting patterns! We suggest starting with something small to test your set up and make any adjustments as needed. Just open the pattern using Project & Cut or Pattern Projector and start cutting.
Try out some of these FREE sewing patterns with projector files to get you started!
Enjoy going from pattern to sewing in faster time then ever when you begin sewing with projectors! If this tutorial helped you, then make sure to share with your friends!
Check out even more Tutorials on the tutorial page!


