*This post may contain affiliate links and we may earn a small commission if you click on them.
Do you have a favorite pattern that doesn’t come with a Projector File? Don’t fret! You can use a letter-sized pattern with your sewing projector!
Today it is easier than ever to make patterns easy to project onto fabric. Originally sewists used PDF Stitcher to stitch patterns together.
Since the development of the new calibration program Pattern Projector, you can now “stitch” and project patterns from the same program!
Learn more about PDF Stitcher HERE.
How to Stitch a Letter-Sized Pattern for Projecting
Step 1: Calibrate Your Projector in Pattern Projector
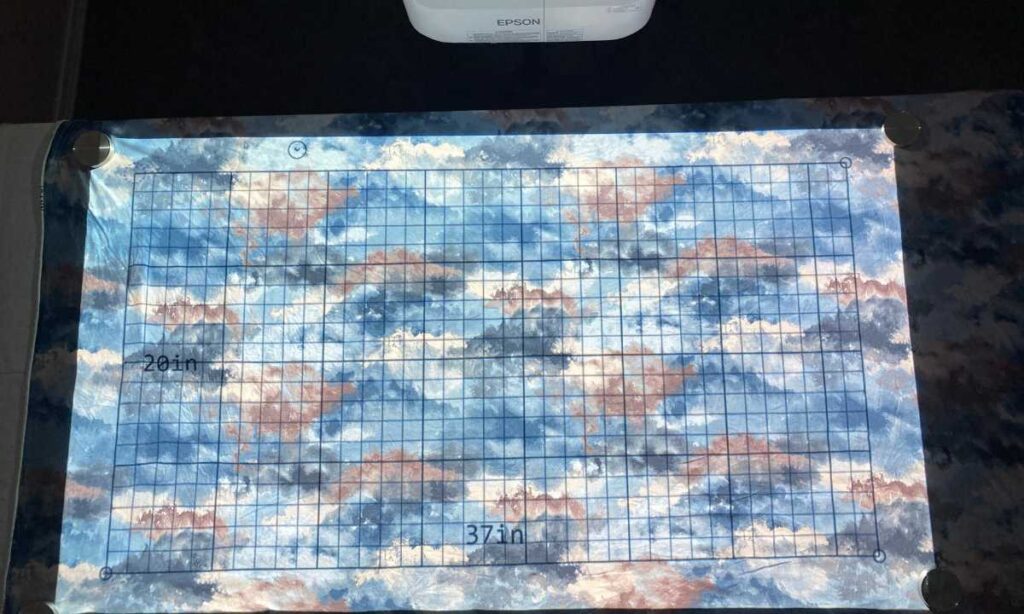
If you haven’t already, use Pattern Projector to calibrate your sewing projector. You can check out this tutorial for full details on how to calibrate using Pattern Projector.
Step 2: Open the Pattern
Next, in Pattern Projector choose “Open PDF”. Find the pattern file on your computer and select open. The pattern will open in one column.
Step 3: Columns and Pages
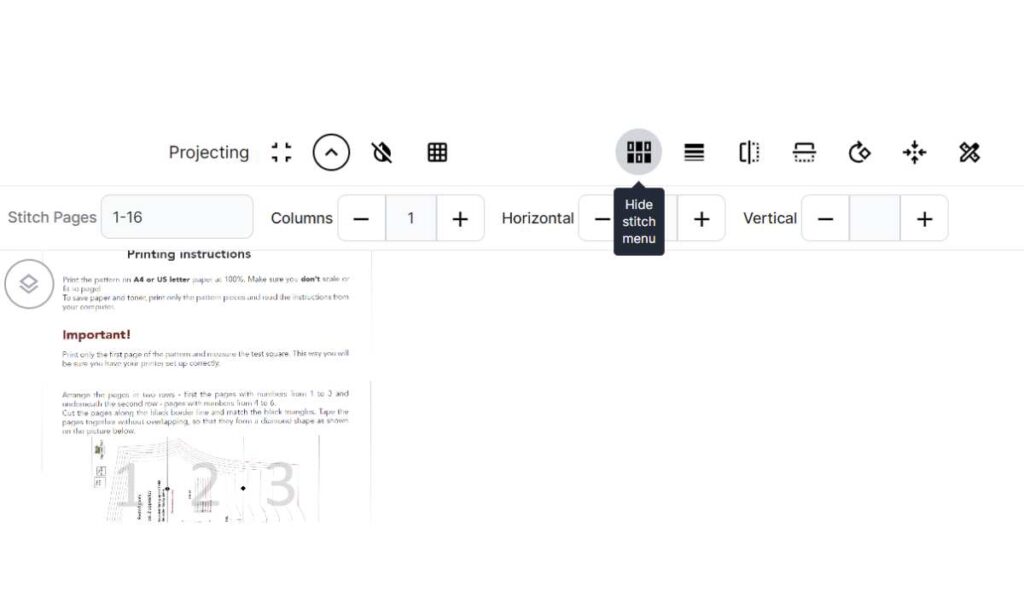
Look at the pattern and find the page number that the pattern begins on. Enter this number as the first page number. Using a pattern layout diagram, if you can, determine the number of columns in the pattern layout. Enter this number in the “Columns” box.
Step 4: Remove Margins
No trim patterns will not need to use the horizontal and vertical movements. You should already see the pattern coming together!
Patterns with trim or overlap margins will need to be adjusted using the horizontal and vertical movements. The plus sign next to horizontal will bring the pages together and the minus sign will move them apart. The pages can also be moved vertically closer or further using the plus and minus next to “vertical”.
Adjust the horizontal and vertical position of the pages until the pattern lines up correctly.
*In some rare cases patterns do not have uniform margins on every page. In these cases, you will need to adjust until one pattern piece is correct, cut out; then, adjust for other pattern pieces.
Step 5: Add Zeros
Zeros are use for blank spaces or place holders in the pattern layouts. In the page number layout, you will need to add a zero for any spaces in the pattern layout. If the top two rows use 7 pieces of paper, but the second and third row only use 6, adding zeros will correct the layout. The pages numbers would look like 1-20,0,21-26.
*See the examples and video below to give you a visual!
Transcription of the Video:
Example 1
Okay, for this first pattern, I went ahead and pulled up the Ash Pants by Mood Fabrics. And you can see it first pulls in, it’s just got this, the pattern all in one column. And it probably pulled in towards the left hand screen. I just moved it over here so you guys can see it a little bit better. I’ve got it open in Pattern Projector, which is a free program that we’re using today to go ahead and stitch this multi page pattern into one whole.
It is no trim pages, so I will not need to worry about the horizontal and vertical movements. I will go over those later. If you have a pattern that has the layout page, you’re going to use that to kind of help you to put it together. The first thing I’m going to look at is which page numbers maybe. I know it’s the first page I will need to leave out because the pattern actually begins on page two, but I’m going to keep this up because I want to know how many columns are going to be in my final pattern.
So, I just count across 1, 2, 3, 4, 5, 6, 7. So I will need 7 columns, I’ll go ahead and put 7 columns in there. But we can see the first row looks like it’s all lined up, and then it kind of messes up for the second row here. It looks like it’s off, and that’s because we don’t want to include this first page here.
I’m going to take off that. We’re going to actually start on page 2. If I look on the layout, I also notice there’s going to be a blank page down here towards the bottom.
I can go ahead and figure out where that’s gonna be. You can just start with 2-34. If you pull this up in Adobe Acrobat Reader, you can find out which page as well.
This one has the pages marked and I could see where it gets off is right here on this page 28. I actually wanna go to, now my page 27, if I did 27, you can see it actually is not correct and that one to 28.
It is a visual editor.
It did my blank here and then this piece here. I actually need to include page 28 there and then 29. And you can it on Adobe Acrobat Reader if you want because it is a visual stitcher.
I see there’s that blank space and now my bottom row is lining up correctly. Zeros are going to be your placeholders anytime there is a blank page or no page that’s printed. You want to put a zero in and then you’ll need to put the page numbers. The page numbers before, the space, and then the rest of the pages.
If there was another row that didn’t have the same number of pages or you need to skip, you would put a zero in there as a placeholder again. So I always start with the columns, then I start with the page numbers that have the patterns on it, and then I make sure I get those zeros in. Since this was a no trim page, I didn’t have to worry about the horizontal and vertical movements, but those will adjust the horizontal movement, or the margins, horizontally and vertically.
Looking for the perfect fabric for your next project?
Discovery Fabrics specializes in fabric for outdoors and active wear and they are obsessed with quality.
Use the coupon “Projector” for $5 of a purchase of $50 or more.
Example 2:
So let’s go ahead and let’s look at another example.
This next pattern that I just want to use as an example is the Tulip Tee by Patterns for Pirates. And they actually have a projector file for this so you could use that, but this is just going to be for demonstration.
Now, I noticed that the pattern actually begins after the tutorial. You could always check on a PDF reader like, Adobe Acrobat Reader, which page it starts on before you go down, but I can see it actually starts on page 18.
Now this didn’t show me a layout, but it’s labeled A, B, C, D. And so that tells me how many columns it has, and it goes to D. We’re going to assume it has four columns on it. We’re going to see if those are columns or if those are rows.
So now I’ve got my columns in here. One, two, three, four. It looks like it’s going A and then B. So actually has all the A’s in one row, so eight columns. And that’s okay. See, it’s a visual editor, so we can look there. It’s actually eight columns. So I’m going to type in eight columns. Now it’s still looking a little bit weird.
We have the eight columns, but you can tell that this was meant to be overlapped when you tape it together. Let’s get rid of these layers here, so you can see it. You can see between A1 and A2, there’s this section that should be overlapped. That’s going to be our horizontal movement. With a horizontal movement, you could type in a number, or you can just push plus.
Okay, and I’m going to keep moving it over. You can see how it is shifting it until it overlaps. And it’s looking really good now, and I just did it using that plus sign. Plus sign will move it close together, and the minus sign moves it further apart. So I just stop when it’s all lined up and that looks great.
Everything’s lined up, but now we have the vertical. So that’s our up and down.
We need to overlap this bottom row here. We’re going to use the vertical. I’m going to go ahead and push the plus. until it is lined up.
Now, this works really well when all the margins are uniform in your pattern. If you don’t have uniform margins, you might have to do each pattern piece separately, project it, and cut it that way. But hopefully the patterns that you have uniform margins that are all the same left and right. So let’s take a look and make sure we don’t have to add a zero anywhere on this pattern.
I do notice that the grain lines are going in different directions, which is very common for those letter sized or those A0 files. I just need to keep that in mind and rotate the image when I am cutting it out. It looks like I’m finished. There’s no need for zeros or for changing those pages.
It’s all stitched together. I could project this. I can also turn the layers on and off that I need or don’t need.
Since it is a layered pattern, even though it was a letter-sized pattern, it had layers in it. I always prefer a pattern that has layers as opposed to no layers. If you have an option of a letter-sized file that is layered and an A0 file that is not layered, go with the layered file always.
Conclusion
Thanks for joining me to learn how to use letter-sized patterns on a sewing projector. In the next update of Pattern Projector, you should be able to download stitched files directly to your device! If you are enjoying the Pattern Projector program, make sure to jump on over and buy the developer a coffee! And thank Charlotte Curtis for contributing code from PDF Stitcher to Pattern Projector!


