Last updated on September 28th, 2022 at 12:57 pm
*This post may contain affiliate links and we may earn a small commission if you click on them.
You may have heard people mention the Basic Niche mount in the projector sewing community. Well, I’m here to see if it is really as good as they say. From buying and preparing a bare metal mount to installation and calibration, learn all there is to know about the Basic Niche mount.
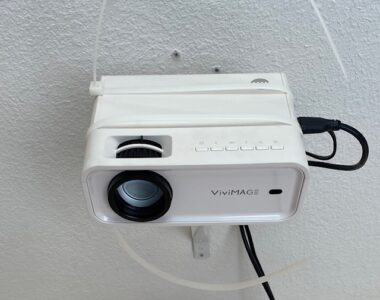
I decided that it was high time that I update my Vivimage Explore 2 projector mount. The first mount that I ever tried was the ball joint mount . Many people have used this one successfully. However, the threading for the screw holding the ball joint still on mine got stripped and didn’t hold the projector still. I returned it to Amazon.
I was too impatient to wait for something else to arrive, so I started looking for a DIY solution. I came up with using an “L” bracket from the hardware store. They are usually used to hold up shelves. It already had a hole in it for a mounting screw.
It wasn’t very steady with one point of contact, so I used zip ties to hold it steady. It didn’t look pretty, but it worked and it wasn’t coming down!
After a while, I decided I was going to switch my setup a little bit. Hence, I went with the Basic Niche mount.
Buying a Basic Niche Mount
Basic Niche is a company owned and operated by a member of the Projectors for Sewing Facebook Group, Karisa Thompson. She creates mounts designed around the dimensions of specific mini projectors. These include the Vivimage Explore 2, Acrojoy 9000, Apeman 350, Apeman 550, Bomaker, and Truewell H3. She also has options for those with vaulted ceilings.
Looking at the options on her website, I could get a bare metal or powder coated mount. A bare metal mount will rust if you don’t protect and/or paint the metal. The white powder coated is ready to go and install. The white powder coated mount will not rust.
The white powder coated mount was out of stock and on pre-order. As I mentioned before, I’m not always patient and I was ready to work on this project! So, I decided to get the bare metal mount.
A bonus with the bare metal Basic Niche mount is that you can customize it to be whatever color you want!
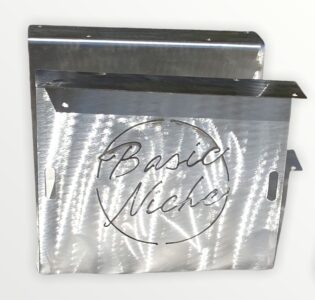
I ordered the bare metal Vivimage Explore 2 projector mount and couldn’t wait for it to arrive! It arrived even faster than I thought because (SURPRISE!) we live in the same city! I had NO idea until I ordered.
It was packaged well in a box and came with an instruction card on installing. It does not come with mounting hardware, so you will need to get that separately.
How to Protect a Bare Metal Basic Niche Mount
If you get the white powder coated mount, then you can skip ahead to installing the Basic Niche mount. For those with a bare metal mount, you will need to protect the metal, so it doesn’t rust on your ceiling.
Supplies for Painting
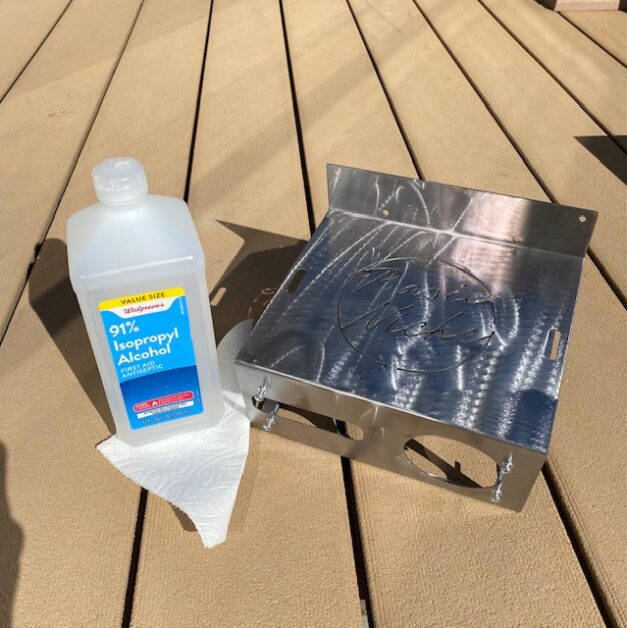
- Rubbing alcohol
- Paper towel or cloth
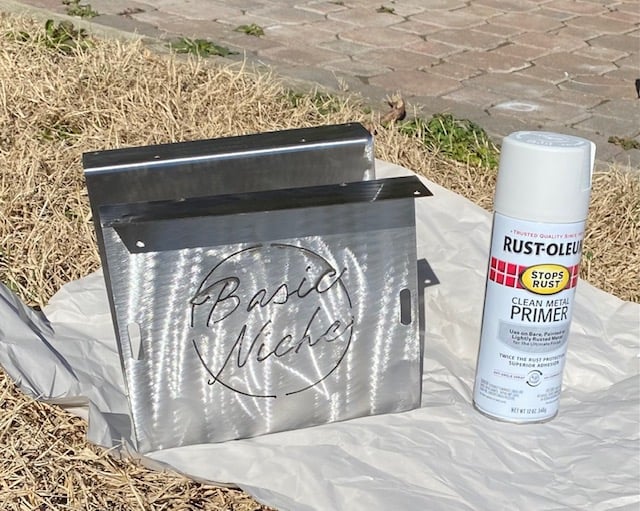
- Bare metal primer
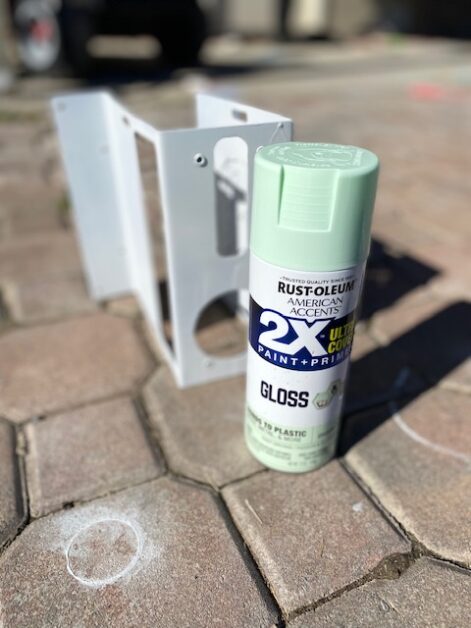
- Metal paint
Step 1: Prepare Mount for Paint
After the manufacturing process, there is residue left on the mount. You need to remove this before painting the mount. You can use soap and water, but soap can leave a film over the metal if not fully rinsed.
I used rubbing alcohol I already had around the house and a paper towel. I wiped the paper towel dipped in rubbing alcohol over the entire surface until it was completely clean.
Step 2: Primer
Metal paint primer comes in a few different colors. I went with white since I wanted to paint it a lighter color. Follow the instructions on the paint can. Do two thin layers for primer over the entire mount, including the inside.
Step 3: Paint Basic Niche Mount
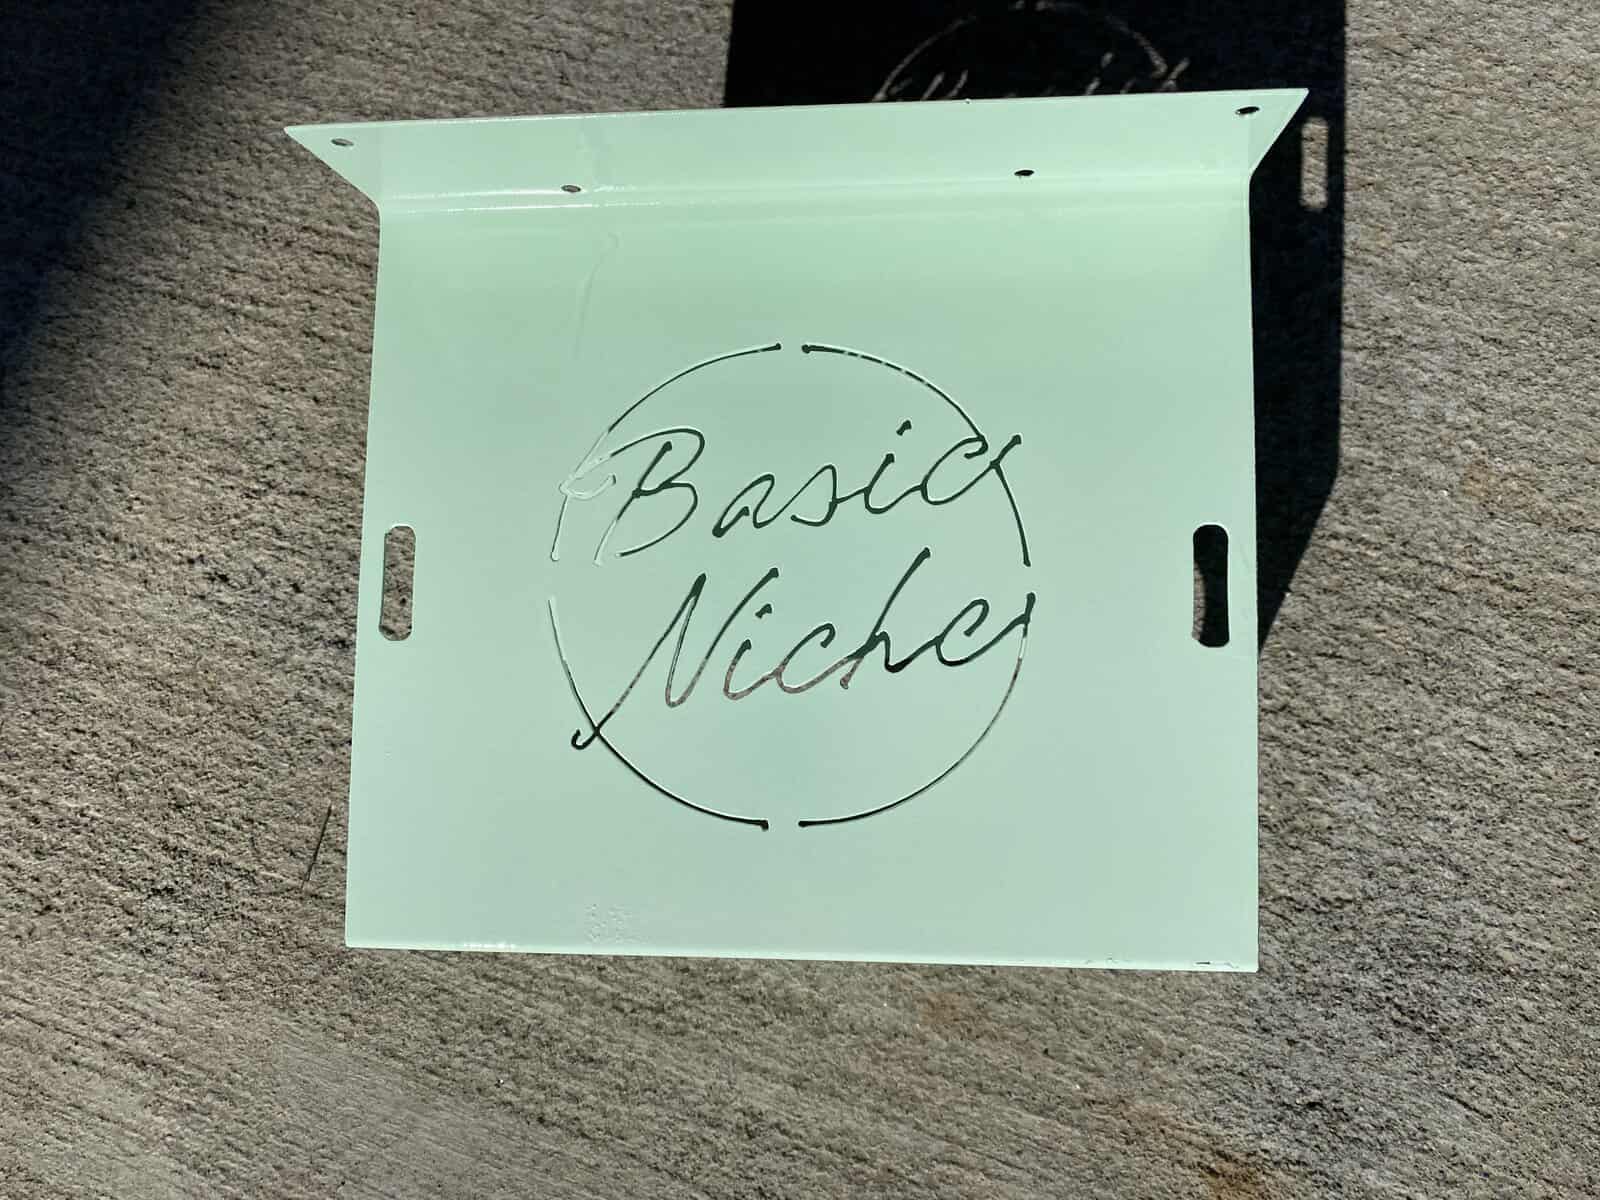
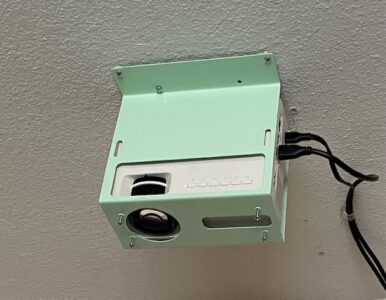
Let your imagination lead you on choosing a paint color! I decided to go with this fun “Modern Mint” color. You can also choose white to have it blend into the ceiling. Or make a statement with a pop of your favorite color!
Paint with smooth even strokes and try not to get too much paint in one spot as it will create runs. Do two coats of color to fully cover the mount.
Step 4: Let Dry
Let the painted mount dry for a full 48 hours before mounting to the ceiling. This will ensure the paint is completely set and it will not stick to the ceiling or your projector. (I know! Waiting is soooo hard!) When it is completely dry, you are ready to install your Basic Niche Mount.
How to Install the Basic Niche Mount
Once your mount is dry (or you have the powder coated mount), then you are ready to install the mount above your cutting surface.
Supplies for installing
- Ladder
- Pencil
- Screw driver and/or drill
- #8 wall board anchors and screws about 1 -1 1/4 inch long (8 sets)
- Basic Niche Mount
- Projector
Step 1: Placement
Put the projector inside the mount. Plug it in and turn it on. It is okay if it is not connected to the computer right now. Using a ladder, hold up the projector where you want it. Make sure the image is showing where your cutting mat will be. A partner is helpful for these steps!
Step 2: Mark Holes
While holding the projector mount, use a pencil to mark where the holes for the projector should go on the ceiling. It may help to have a partner for this too. Next, set the projector and mount aside.
Step 3: Install anchors
Following the directions on the package, install the drywall anchors where you marked the holes. Do not put the metal screws in yet.
Step 4: Secure the Mount
Make sure you have removed the projector from the mount before doing this next step. Now, hold up the mount and screw it to the ceiling where you have placed the anchors using the metal screws.
Step 5: Insert Projector
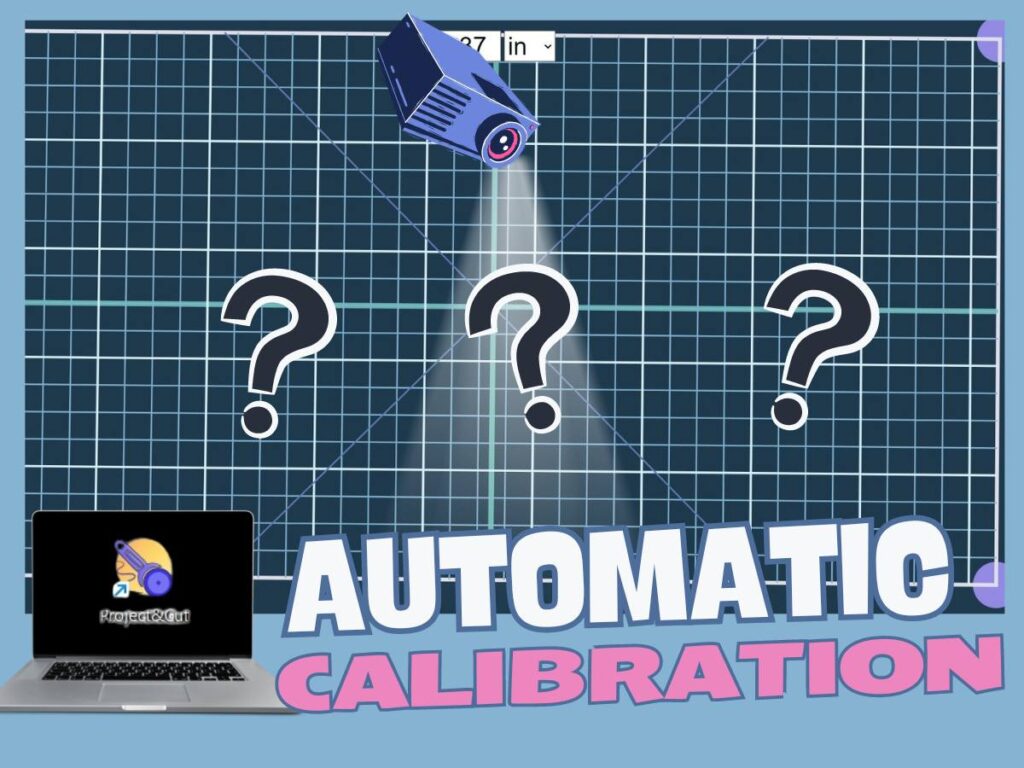
Now you can insert the projector into the mount and calibrate in Adobe! If you need directions on how to calibrate, then follow the instructions How to Calibrate a Projector for Sewing.
Step 6: Calibrate
Don’t forget to calibrate your projector before sewing. The Basic Niche mount makes it very easy to calibrate. There are set screws built into the bottom of the projector to make minor adjustments to the tilt of your projector as needed.
First focus the projector by turning the focus dial around the lens. You may need to check that the lens is fitting through the hole on the mount and not hitting the edges. You should be able to read the text on the menu screen. Then, check that your keystone is in the middle or neutral position.
Hands down, the Basic Niche mount made calibrating easier than with any other mount I used. I was able to calibrate in 7 minutes from the time that I turned on the projector to when I was happy with the calibration! And that was with me stopping to take a few pictures!
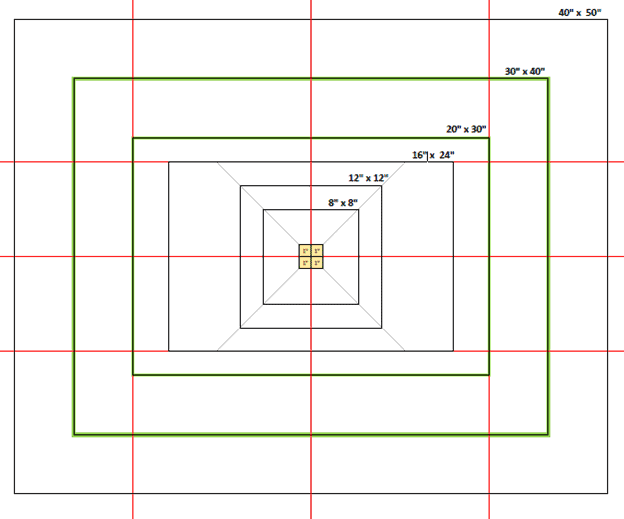
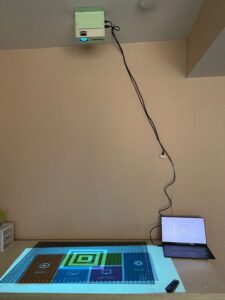
My Vivimage Explore 2 in the Basic Niche mount is at 62 inches (157.5 cm) from lens to cutting mat. I gained an extra 2 inches from my previous setup, which I thought was pretty close to the ceiling! The calibration zoom I got in Adobe is 32.2% and I get an image that is 24.5 in x 43.5 in (about 59cm x110cm).
My previous setup took about 30 minutes to completely calibrate and get the projector tilted just correctly. I plan to get a longer power cord to go with my longer HDMI cord. Then, I will conceal all of the cords in a cord keeper. The cords are currently attached to the wall using 3M hooks.
Review of the Basic Niche Mount
Now that I have tried a few different mounts for my mini projector for sewing, I can say the Basic Niche mount really is the best on the market for sewing. You won’t find another one like it!
The Basic Niche mount cradles the projector as close to the ceiling as possible. This maximizes the distance between the projector lens and cutting surface. You will get the largest image possible with your mini projector and space you have.
The Basic Niche mount does not have any moving parts that will allow your projector to slip, crack, or fall! I saw a horror story of one projector breaking off where it was mounted to the projector mount. It came crashing down, but thankfully nobody got hurt! Since the entire projector is surrounded by metal and secured to the ceiling, there is no pressure on the mounting hole on the back of the projector. You will not need to worry about it becoming brittle and breaking! When installed with appropriate drywall anchors, it is a very steady mount that will not break or shift!
Calibration is a breeze! The Basic Niche mount comes with four set screws for easy titling if needed. I found all I had to do was focus the lens, set the keystone in neutral, then find my zoom in adobe! I was calibrated within 7 minutes! That was me taking my time!
Have you dreamed of using your sewing projector for movies too? Now, I wouldn’t hesitate removing my projector from the mount and using it for movies on the weekend! It is so easy to put back and check the calibration.
Finally, this projector was designed for sewing! The owner of Basic Niche is a member of the projector sewing community. Her mount was designed to hold the projector facing down and maximize the distance between lens and cutting surface.
- Maximize distance
- Steady mount
- Easy calibration
- Dual uses
- Designed for sewing
Conclusion
If you want the most pain-free and easiest calibration for your mini projector, I recommend using the Basic Niche mount! The bare metal mount is a bit cheaper, but requires a little bit of prep on your part. Enjoying customizing the bare metal mount!
I can’t wait to see your projector setup! Feel free to send me a picture to include on the website!